Google Flow Tools 2026 — Build Custom AI Workflows Without Writing a Single Line of Code
Most people who use Google Flow AI spend their time in the generation interface — writing prompts, tweaking settings, generating clips and images. That’s where the creative work happens.
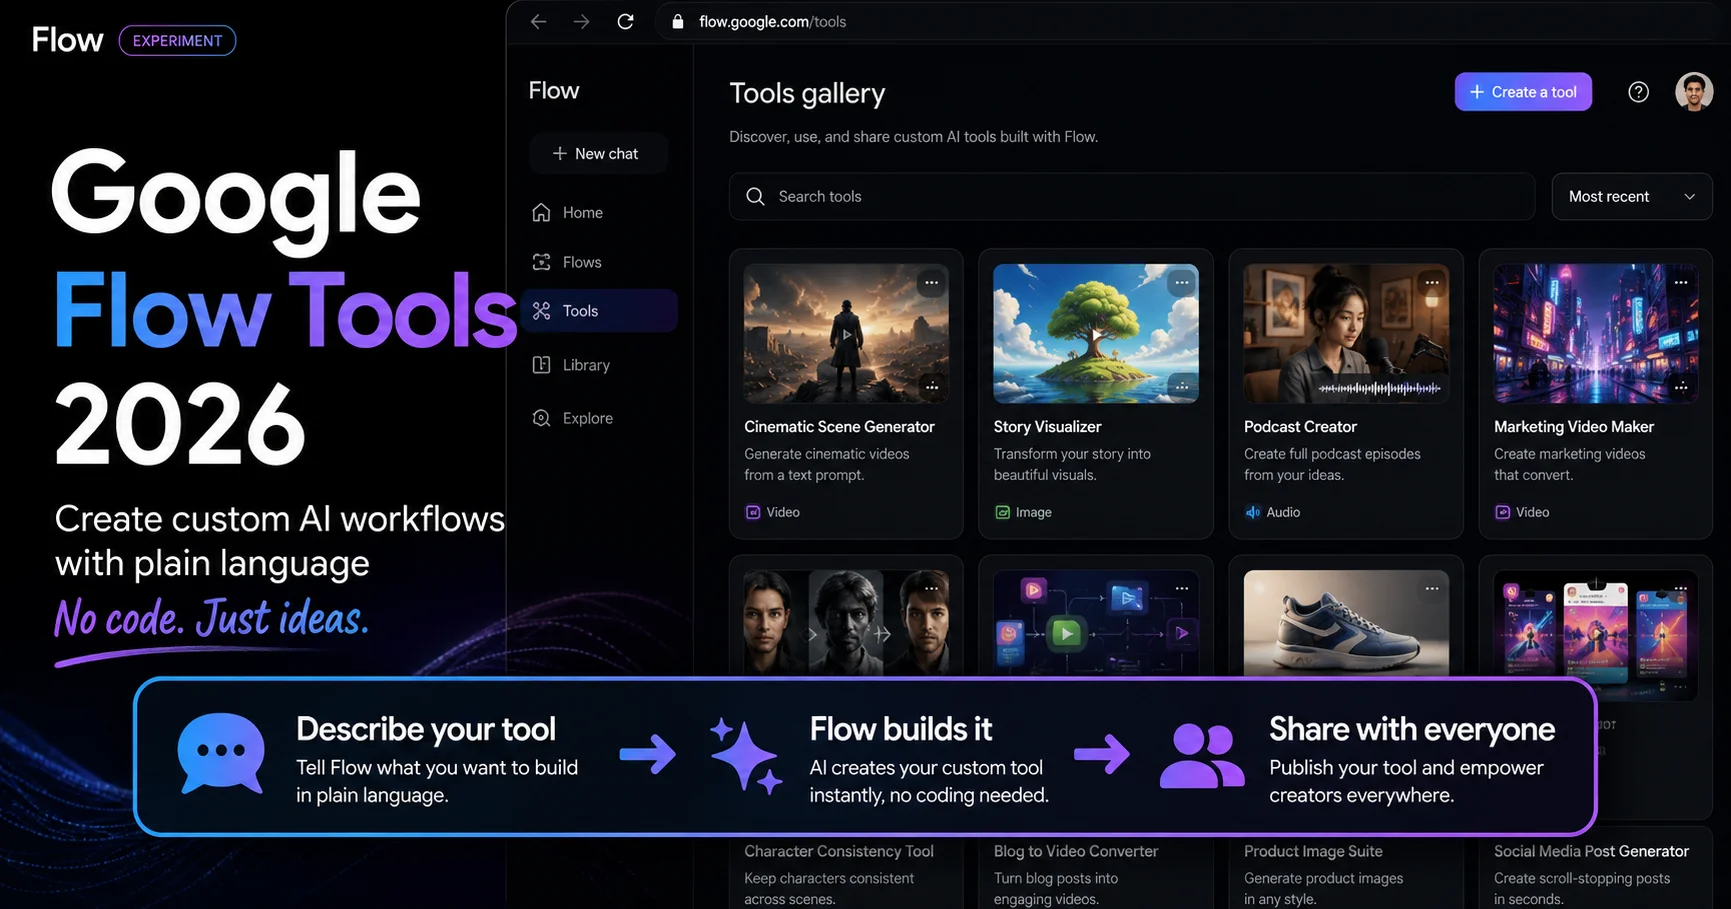
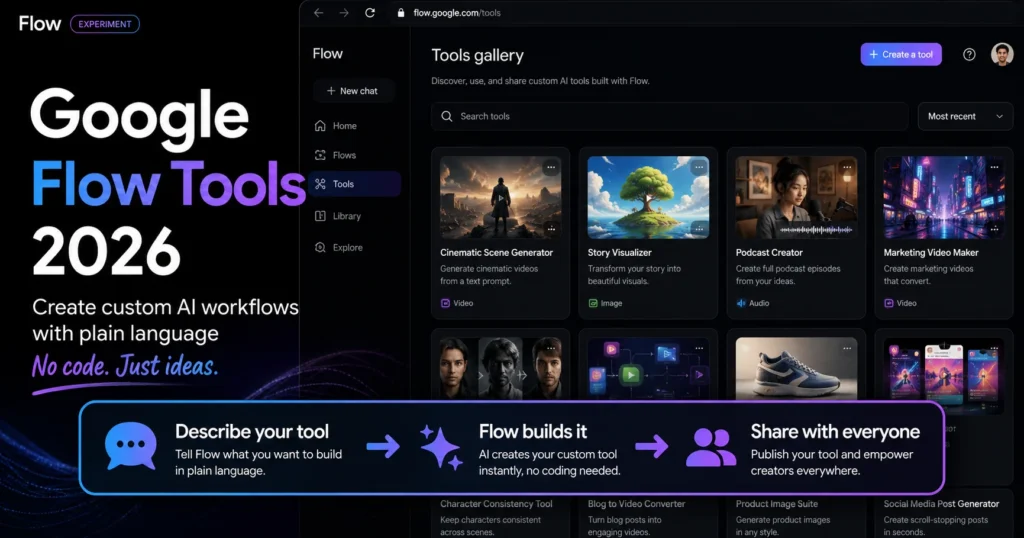
But there’s a whole other layer of Flow AI that most users haven’t discovered yet. With Google Flow Tools 2026, you can now use natural language to create bespoke tools and workflows in Google Flow. Whether you’re looking for a particular image editor, video resizer or custom shader, you can now easily develop them — no coding experience required.
This feature launched on May 19, 2026 as part of the Google I/O 2026 Flow update, and it represents something genuinely new: a creative marketplace built inside an AI tool, where creators build and share reusable workflows with each other.
This guide explains exactly what Google Flow Tools is, how it works, how to build your first tool, and why it matters for your creative workflow.
What Is Google Flow Tools?
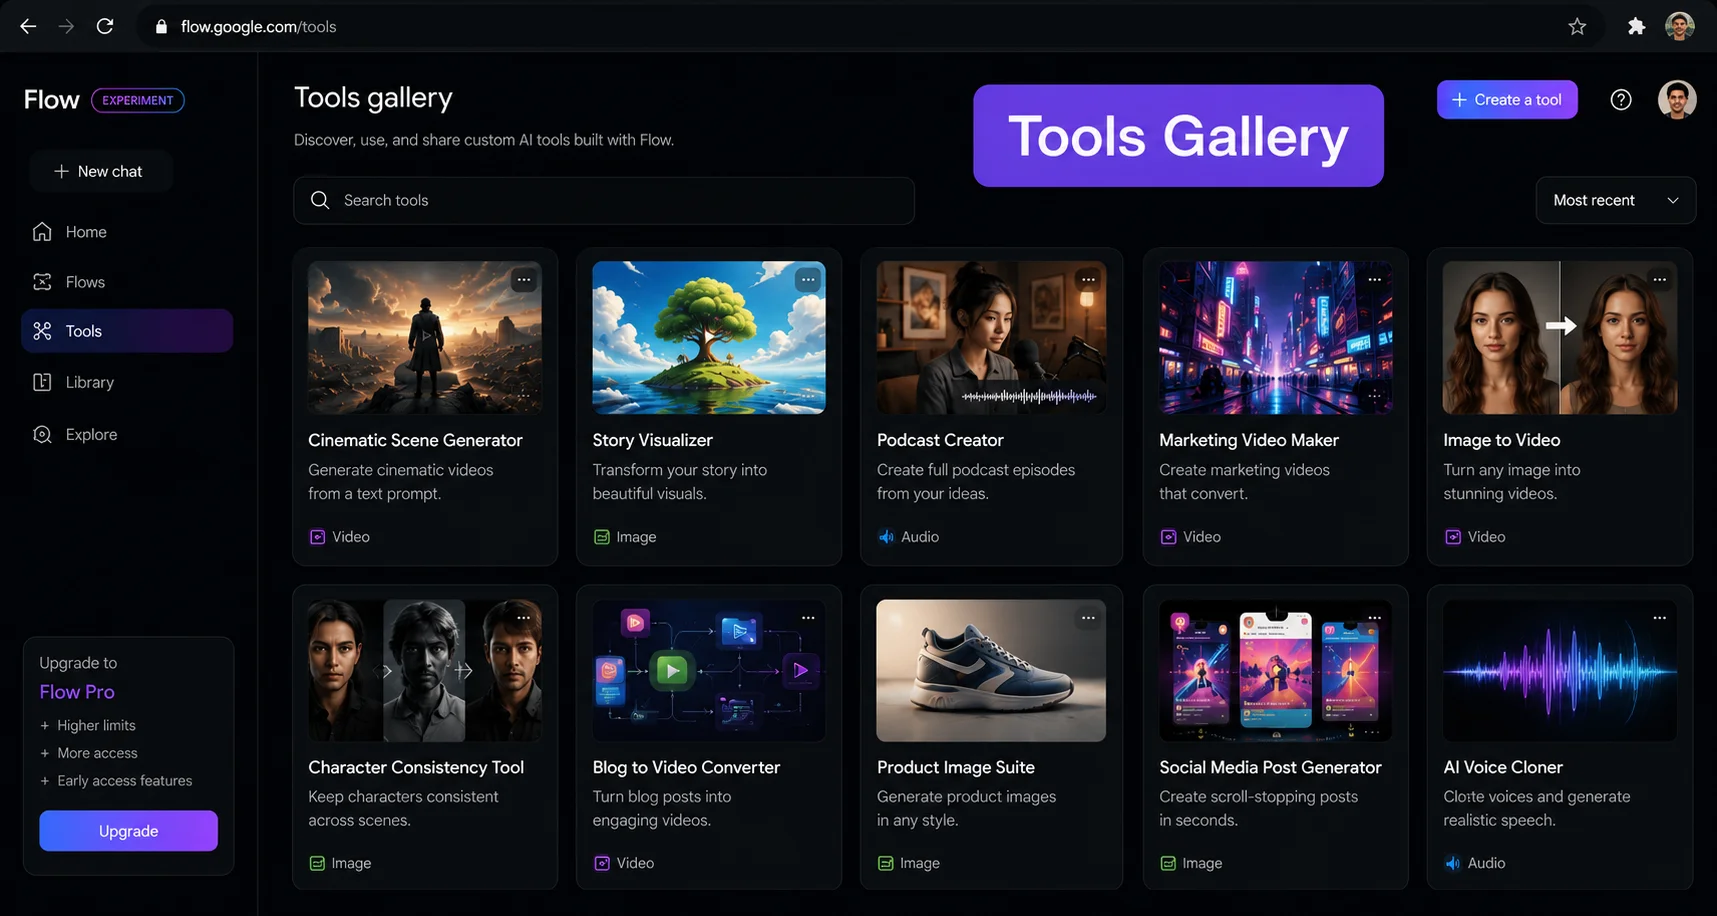
Flow Tools are custom, reusable AI workflow configurations that you build once and apply repeatedly. Think of them as saved “recipes” for AI generation — you define the inputs, the style, the constraints, and the model behavior in plain language, and Flow packages it into a tool anyone can use.
Here’s the simplest way to understand it:
Without Flow Tools: Every time you want to generate a video in your signature cinematic style, you write out the same long, detailed prompt — lighting parameters, camera instructions, color grading direction, aspect ratio, audio mood. Every. Single. Time.
With Flow Tools: You build a tool once that encodes all those parameters. Next time — and every time after that — you just open the tool, type a short description of the specific scene you want, and Flow applies all your saved parameters automatically.
Google calls this “vibe coding” for creative tools — the same concept that has taken off in software development, applied to creative production workflows. You describe what you want a tool to do in natural language. Flow’s AI builds the actual code and functionality behind it. You get a working tool that does exactly what you described, built specifically for your creative process.
What Can You Build With Flow Tools?
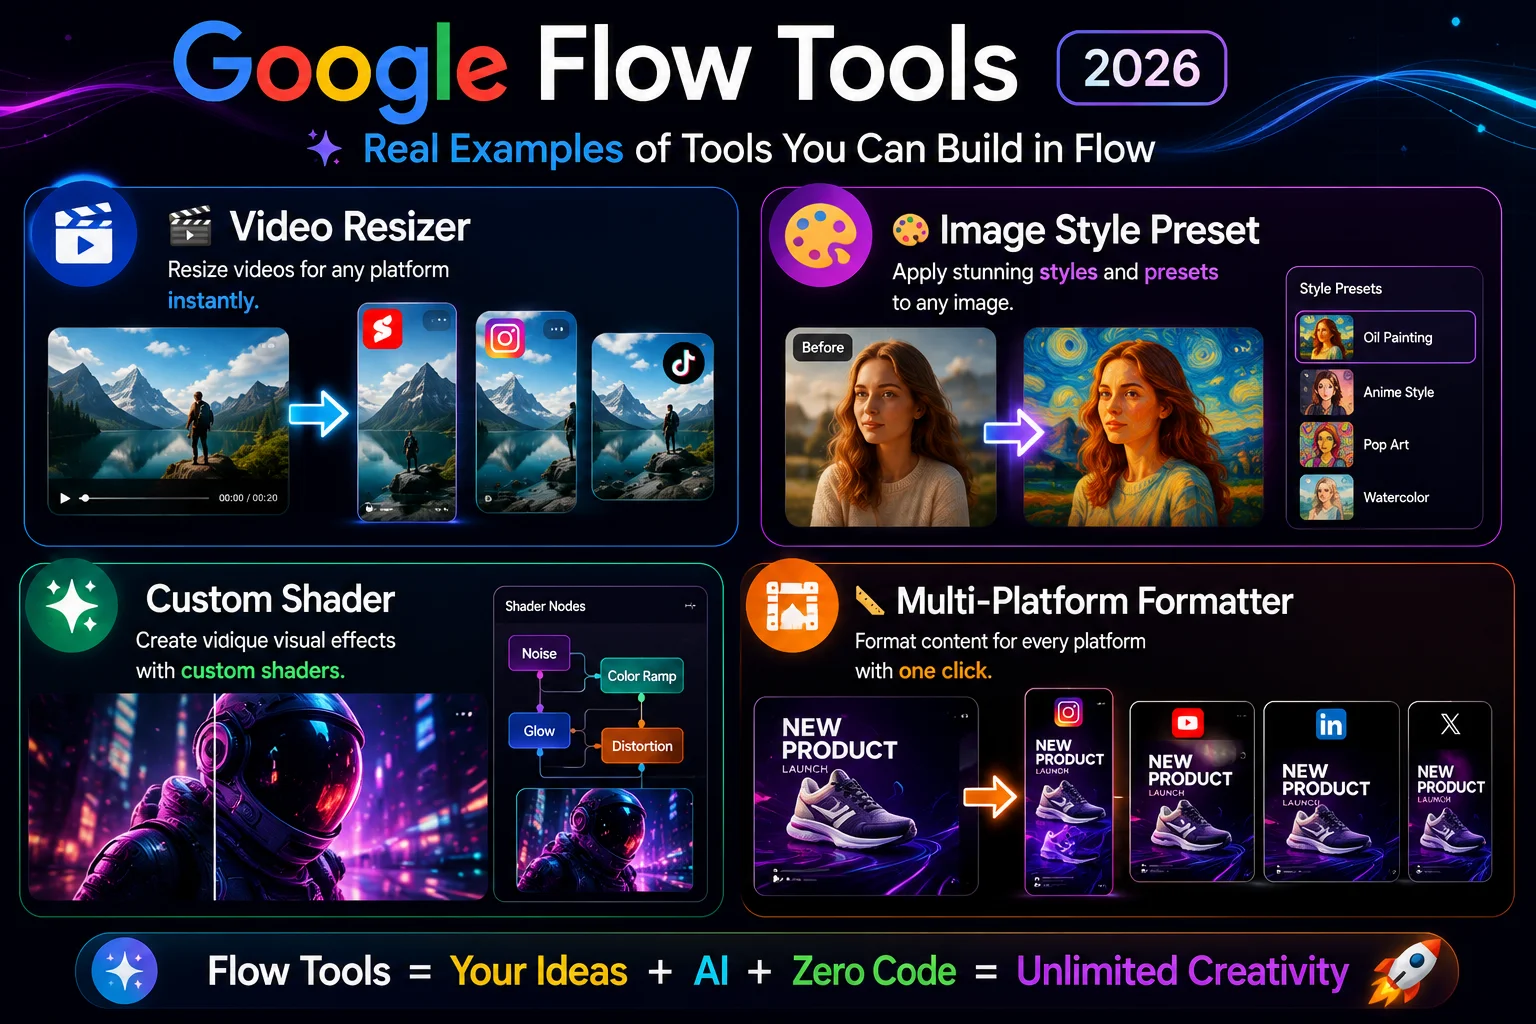
Examples of tools creators have built include: a video resizer that automatically adjusts generated clips to the exact dimensions needed for different platforms, a custom image editing tool that applies a specific color grading style consistently across all generations, and custom shaders for post-processing effects.
Here are more specific examples of what Flow Tools can do:
Video resizer with multi-platform output: You build a tool that takes any Flow AI video and automatically reformats it to 16:9 (YouTube), 9:16 (Reels/TikTok), and 1:1 (Instagram feed) — all at once, without manual cropping.
Brand style preset: A tool that encodes your brand’s specific visual identity — your color palette, lighting style, camera preferences, audio mood — and applies it consistently to every generation, ensuring all content looks like it came from the same production.
Character scene generator: Define a specific character’s appearance once, then build a tool that lets you generate new scenes featuring that character without re-describing them every time.
Lo-fi and glitch effects: Early access partner László Gaal created a tool called “pixelBento” to apply post-processing effects like lo-fi and glitch aesthetics — a real example of a creator building something specific to their style and sharing it with the community.
Prompt template manager: A tool that takes a short scene description from you and expands it into a full, detailed generation prompt automatically — consistently applying all the prompt engineering best practices from our Best Google Flow AI Prompts guide.
Free vs Paid — Who Can Use Flow Tools?
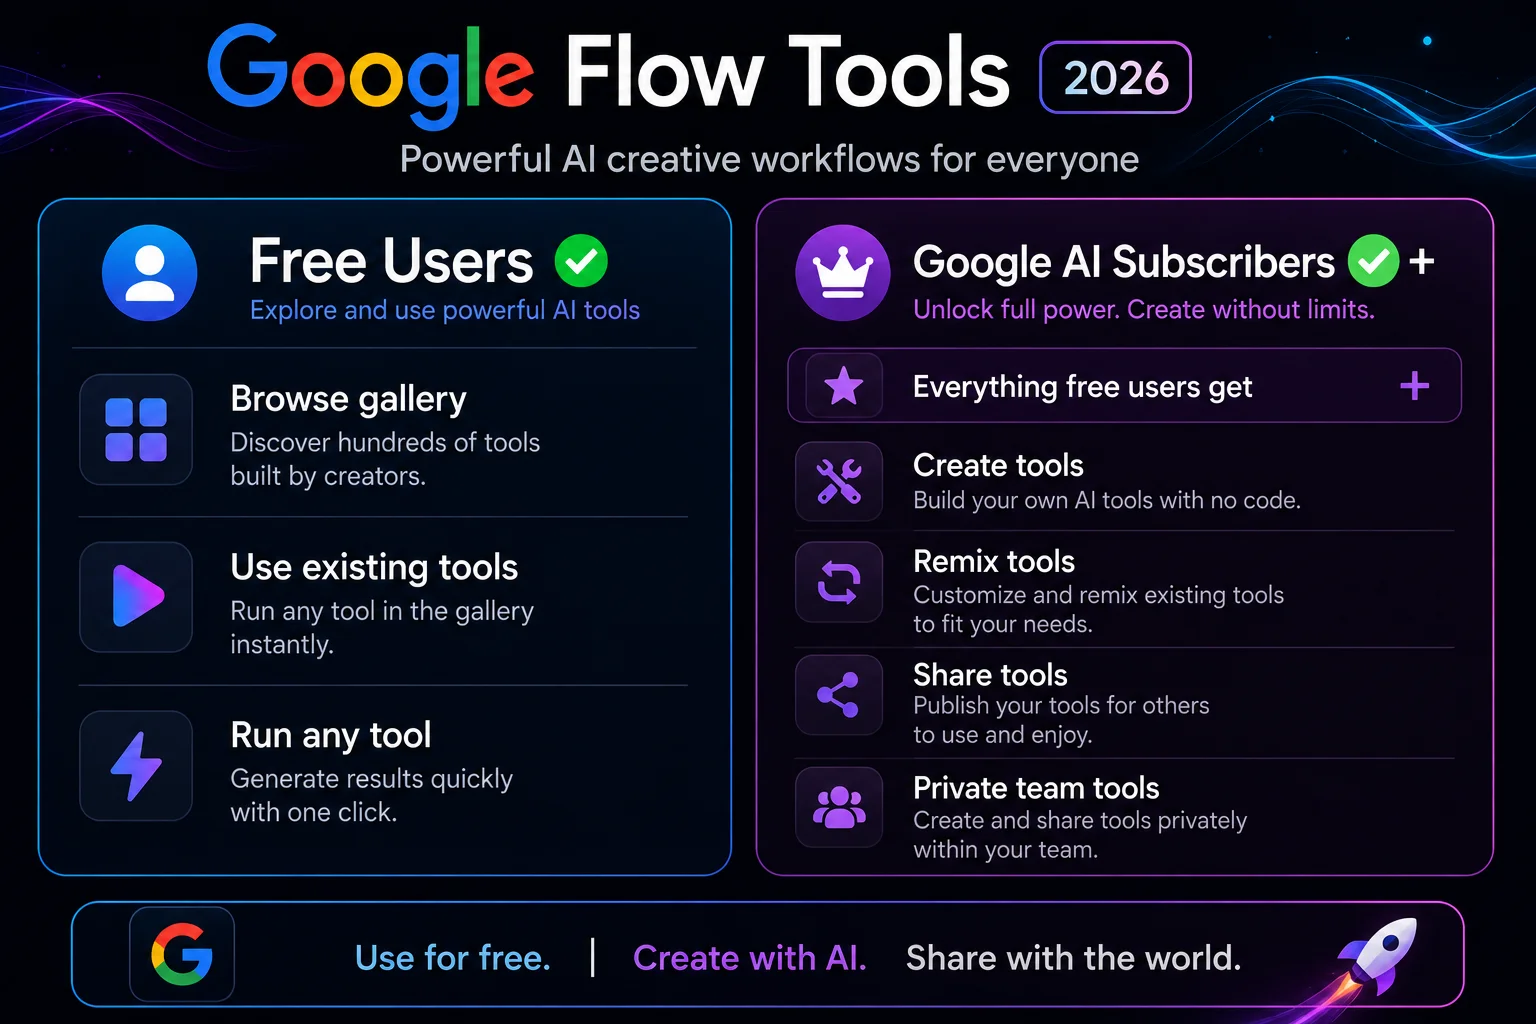
All Flow users globally are able to use existing Tools, while Google AI subscribers can also create and remix them.
This is an important distinction:
Free users can:
- Browse the entire Flow Tools gallery
- Run any publicly available tool created by other users
- Use partner tools (like pixelBento and others from Google’s early access partners)
Google AI Plus, Pro, or Ultra subscribers can:
- Everything free users can do, plus:
- Build their own custom tools using natural language
- Remix existing tools and modify them for their specific needs
- Share their tools publicly in the gallery for other creators to use
- Create private tools visible only to their team — essentially a shared brand kit for collaborative production
Free users can use templates; paid plans let you remix or create custom tools.
For Pakistan users, Google AI Plus at approximately Rs. 1,400/month unlocks tool creation. See our Pakistan access guide for payment details.
How to Use Existing Flow Tools (Free)
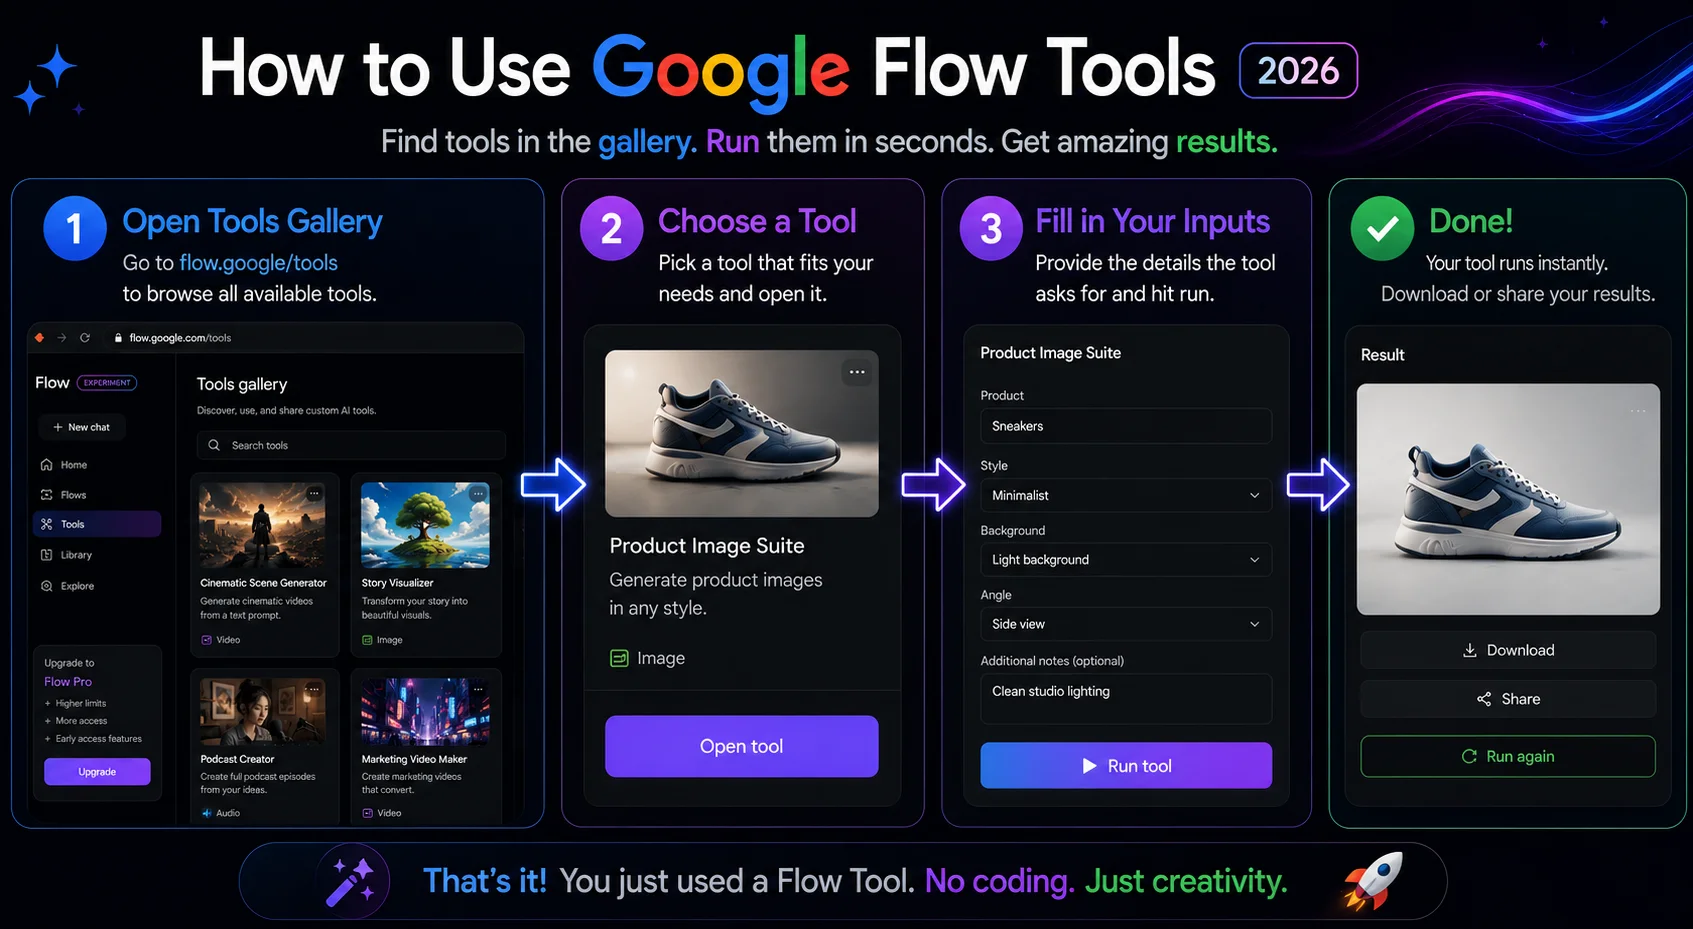
Step 1: Open the Tools section in Google Flow AI Go to flow.google and sign in with your personal Google account. Look for the Tools section in the navigation — it was added as part of the I/O 2026 update and appears as a dedicated section alongside the main generation interface.
Step 2: Browse the gallery The Tools gallery shows publicly available tools created by Google’s partners and the creator community. You’ll see tools for different purposes — style presets, video editors, format converters, and experimental creative tools.
Step 3: Select a tool Click or tap on any tool to see what it does. Each tool has a description explaining its purpose, the inputs it accepts, and examples of what it produces.
Step 4: Fill in your inputs and run Most tools ask for simple inputs — a scene description, a character name, a subject to photograph. Type your specific content into the input fields and click generate. The tool handles all the complex prompt engineering and parameter settings automatically.
Step 5: Download your result Your output appears in your Flow AI library like any other generation — download it the same way.
How to Build Your Own Flow Tool (Paid)
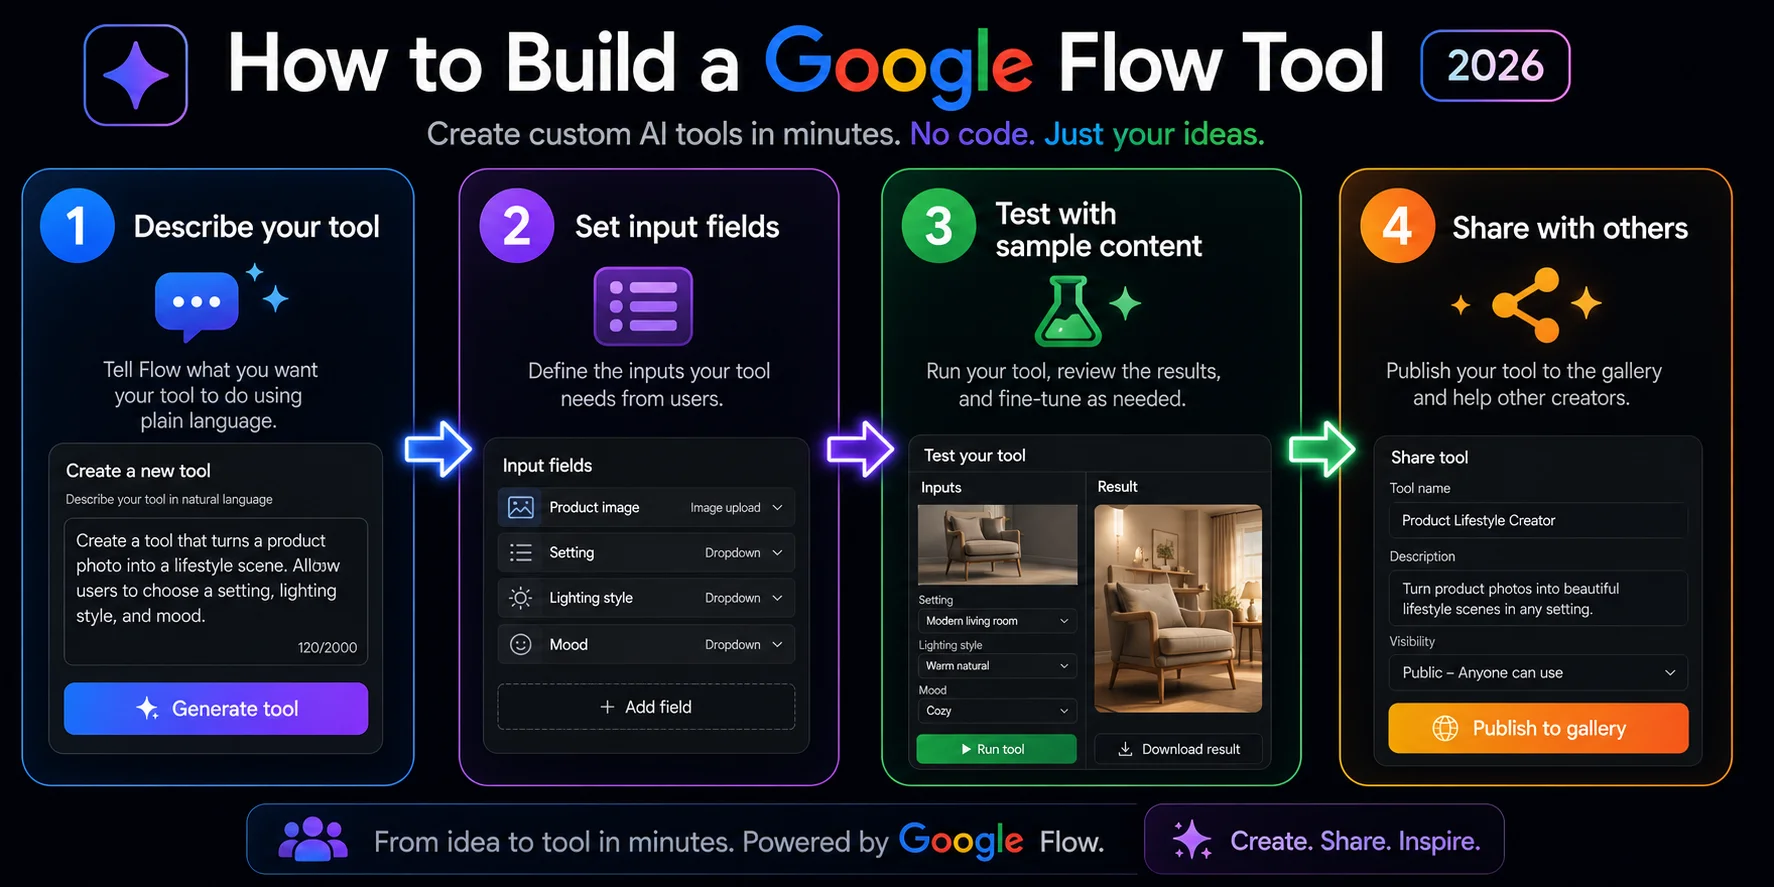
If you’re on a paid Google AI plan, here’s how to create your first Flow Tool:
Step 1: Go to Create Tool In the Tools section, look for the “Create Tool” or “Build” option. This opens the tool builder interface.
Step 2: Describe what your tool should do Write a plain-language description of your tool’s purpose. Be specific about:
- What input does the user provide? (a scene description, a photo, a character name?)
- What parameters should always be applied? (16:9 ratio, golden hour lighting, a specific color grade?)
- What should the output look like? (a video clip, an image, a formatted export?)
Example description: “A tool that takes a brief scene description from the user and generates a cinematic 9:16 video with warm golden hour lighting, a slow camera push-in, and ambient environmental audio — formatted for Instagram Reels.”
Step 3: Set up input fields Define the variables the user fills in each time (like a character name or scene location) and style parameters — visual direction like lighting, aspect ratio, color grading, or camera movement.
Use dropdowns for options that should be limited (aspect ratio choices: 16:9, 9:16, 1:1). Use text fields for open-ended inputs (scene description). The fewer inputs you require, the easier your tool is to use.
Step 4: Test your tool Run your tool with several different inputs to make sure it produces consistent results. If a tool isn’t performing as expected, refine prompts or adjust settings to improve outcomes.
Step 5: Name and publish Give your tool a clear, descriptive name and optional icon. Choose whether to make it public (shared in the gallery for all Flow users) or private (visible only to you or your team).
Flow Tools vs Flow Agent — What’s the Difference?
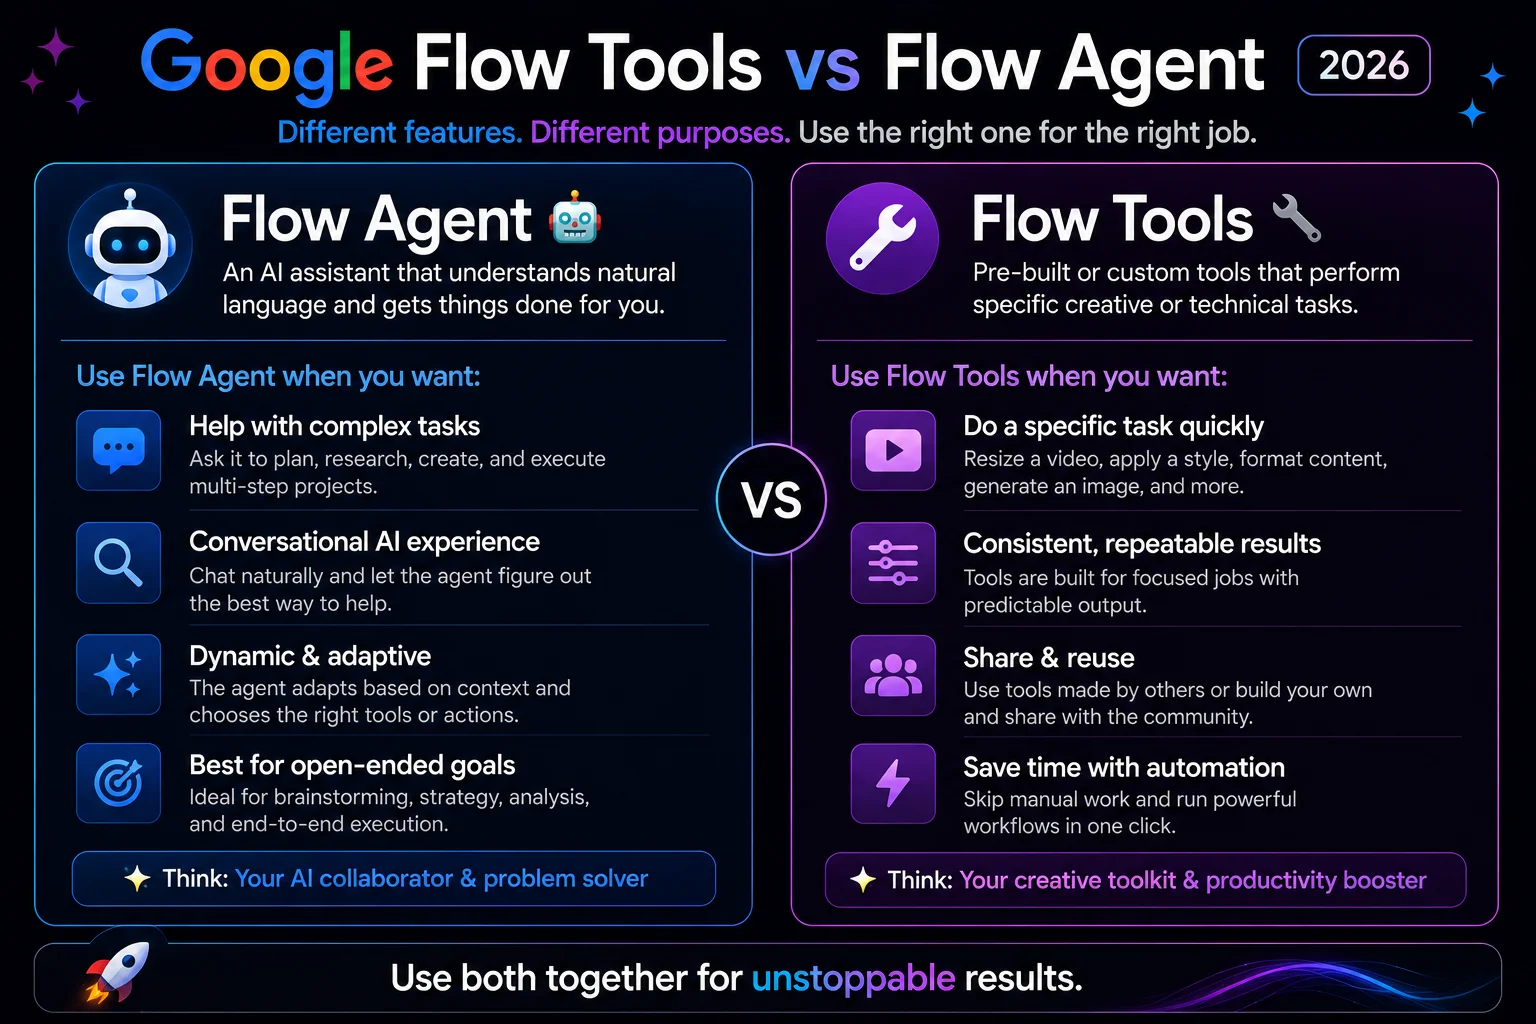
These two features launched together at I/O 2026 and are easy to confuse. Here’s the clear distinction:
Flow Agent is the AI assistant that helps you brainstorm, create, and manage your project conversationally. Flow Tools is the system for building custom creative tools using natural language. They are separate but complementary — you might use Flow Agent to help plan your workflow and then use a Flow Tool to execute a specific editing task within it.
| Flow Agent | Flow Tools | |
|---|---|---|
| What it is | AI creative partner / project manager | Custom reusable workflow builder |
| How you use it | Conversation — ask it to help you plan and execute | Select a tool → fill inputs → generate |
| Built for | Complex, multi-step creative projects | Specific, repeatable tasks |
| Free access | ✅ Yes — all users | ✅ Use tools (create requires paid) |
| Best example | “Help me plan a 5-scene short film and coordinate the assets” | “Apply my brand color grade to this video” |
For the complete guide to Flow Agent specifically, see our Google Flow AI Agent guide.
Real World Use Cases — Who Should Use Flow Tools?
Content creators with a consistent style: If your YouTube channel or Instagram feed has a recognizable look — specific lighting, camera feel, color treatment — encode it as a Flow Tool. Every generation you make will automatically match your established aesthetic without re-entering the same parameters every session.
Marketing teams and agencies: A creative agency can prepare a tool that bundles a client’s brand kit (palette, font, audio jingle, standard transition) and let the whole team run it without any member needing to know the underlying parameters. This is one of the most powerful enterprise use cases — standardizing AI generation across a team.
Creators making serialized content: If you produce a YouTube series, podcast with visual content, or ongoing social media campaign, a Flow Tool that maintains consistent visual language across every episode saves significant time and ensures brand cohesion.
Educators building teaching materials: Create a tool that generates educational visuals in a consistent illustrated style — so every lesson has matching visual aesthetics without starting from scratch each time.
Individual power users: Even solo creators benefit from encoding their most-used prompt formulas as tools. Our Best Google Flow AI Prompts guide has examples of the kind of detailed prompts that are worth turning into tools.
Limitations of Flow Tools — What It Can’t Do
No conditional logic. Tools don’t support branching (if X, do Y). They’re linear workflows. If you need decision-making in your automation, Flow isn’t the right fit. Media outputs only — Tools produce images and video. They don’t generate text documents, send emails, update databases, or interact with other software.
Daily quotas restrict the number of tools you can create, which may pose challenges for heavy users. Output control is limited — even with detailed Tools, AI generation is probabilistic. You’ll get variation between runs, which is sometimes a feature but can be a problem when you need pixel-perfect consistency.
Additionally: the community Tools library is still growing — compared to mature creative platforms, the selection of available tools is still relatively limited as of June 2026. This will expand as more creators build and share their tools, but if you’re looking for a specific niche workflow, you may need to build it yourself rather than find it in the gallery.
Frequently Asked Questions
Q: What is Google Flow Tools?
Flow Tools are custom, reusable AI workflow configurations that you build once and apply repeatedly — saved “recipes” for AI generation where you define inputs, style, constraints, and model behavior in plain language, packaged into a tool anyone can use.
Q: Is Google Flow Tools free?
Using existing tools in the gallery is free for all Flow AI users. Creating, remixing, and sharing your own tools requires a Google AI Plus, Pro, or Ultra subscription.
Q: Do I need to know how to code to use Flow Tools?
No coding experience required. You describe what you want in plain language and Flow builds the tool functionality for you.
Q: When did Flow Tools launch?
May 19, 2026, as part of Google’s I/O 2026 announcements for Google Flow.
Q: How is Flow Tools different from Flow Agent?
Flow Agent is a conversational AI assistant for project planning and creative collaboration. Flow Tools is a system for building reusable workflow presets. They’re complementary — different tools for different parts of the creative process.
Q: Can I share my Flow Tools with other people?
Yes — if you create something you think others might like, you can easily share your tool with other Flow users, who can remix it into their own. Paid subscribers can also create private tools visible only to their team.
Q: What are some examples of tools in the Flow Tools gallery?
Early examples include pixelBento by László Gaal (lo-fi and glitch post-processing effects) and tools from creators Kat Zhang and metapuppet. The gallery continues to grow as more creators contribute.
Final Thoughts — The Creative Marketplace Is Just Starting
Flow Tools is the first real creative marketplace infrastructure inside a generalist AI editor. The winners will be the creators who publish the presets that become style standards first.
That observation is exactly right — and it applies to you, not just large agencies. The creators who build Flow Tools now, while the gallery is still growing, have the opportunity to establish their workflows as go-to tools for other creators before the space gets crowded.
Even if you never publish a tool publicly, building private Flow Tools for your own workflow is genuinely valuable. Encoding your most-used prompts and style parameters as tools means every session starts from a stronger baseline — less time writing setup prompts, more time on actual creative decisions.
Go to flow.google, find the Tools gallery, and start with the existing tools before building your own. See what’s there, try a few, and pay attention to how the inputs and outputs are structured. That’s the fastest way to understand what’s possible before you start building.
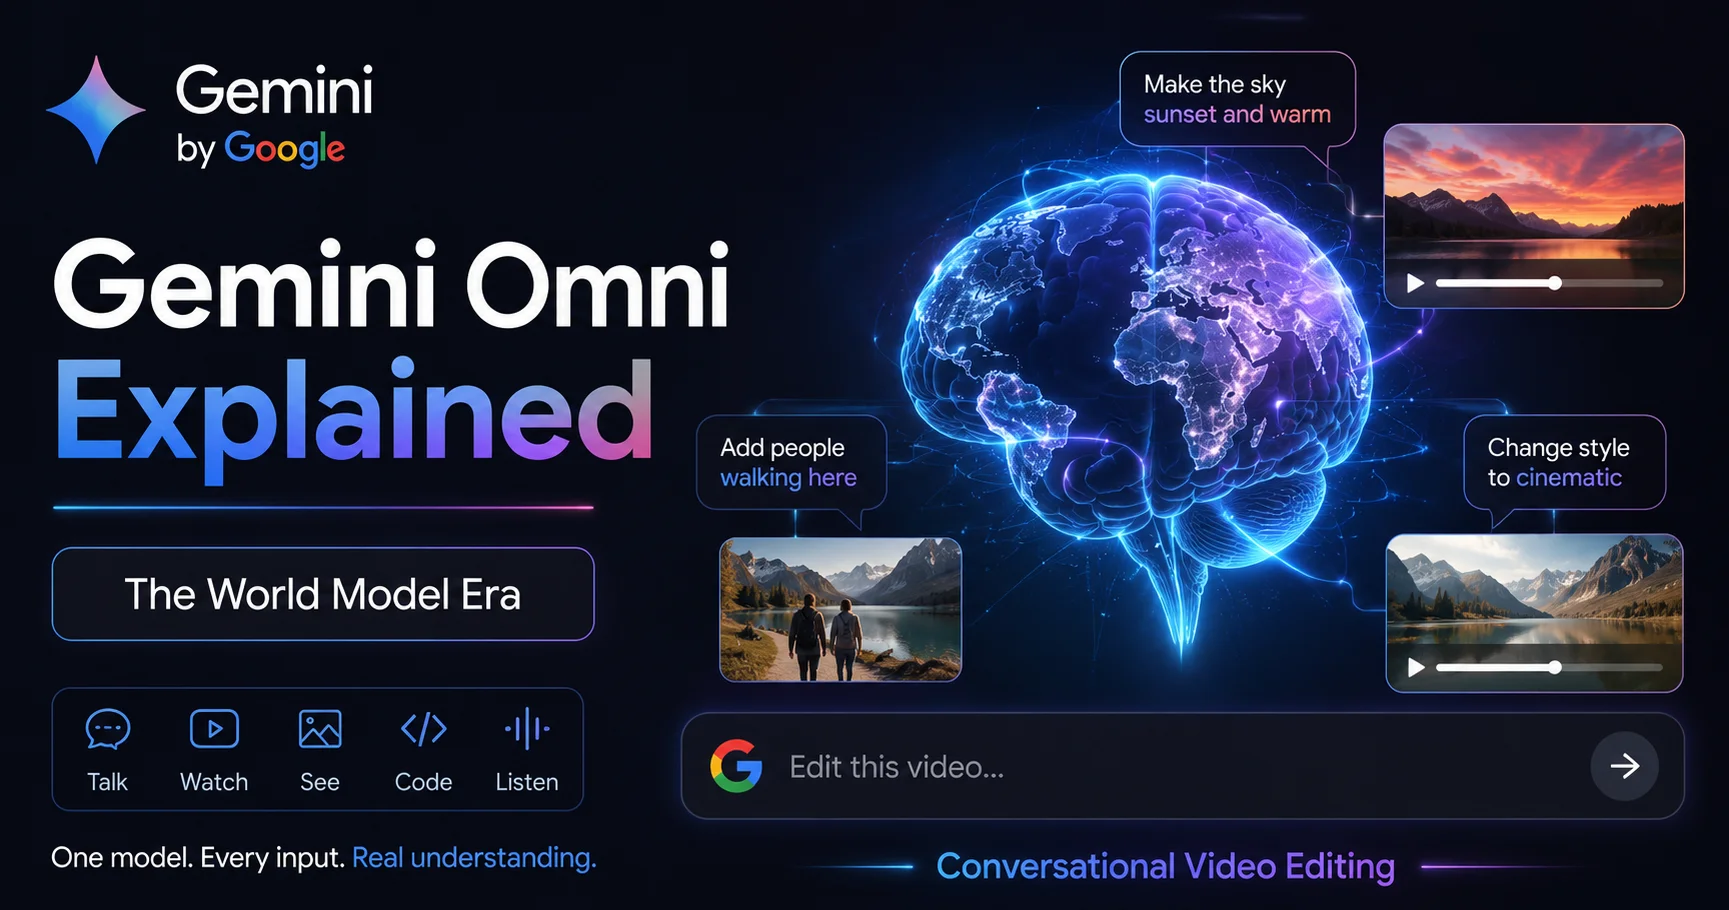
For everything else happening in Google Flow AI — from the Veo 3.1 audio system to Gemini Omni’s conversational editing — visit WhiskAILabs for the complete guide library.
Related Articles on WhiskAILabs:
- Home — WhiskAILabs.net
- Google Flow AI Agent Guide 2026
- Gemini Omni Explained 2026
- Google Flow AI I/O 2026 Update
- What Is Google Flow AI?
- Google Flow AI Tutorial — Step by Step
- Best Google Flow AI Prompts 2026
- Veo 3.1 Update 2026 — All New Features
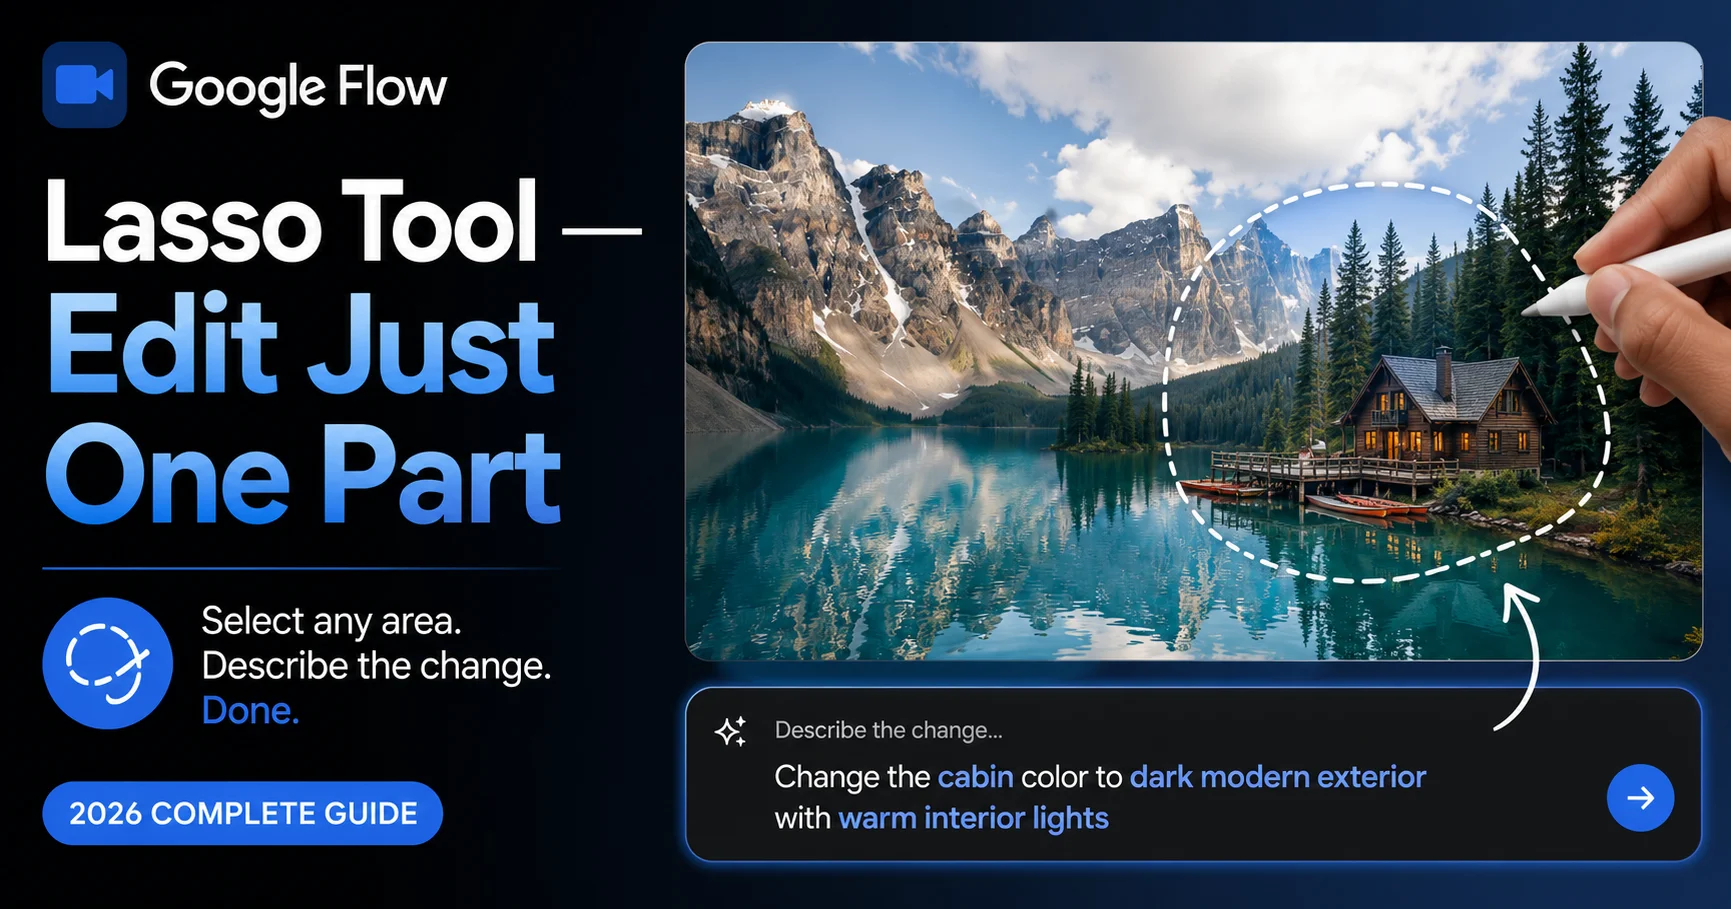
- Google Flow AI Lasso Tool Guide
- Google Flow AI Review 2026
- Google Flow AI Pricing 2026
- Pakistan Access Guide for Google AI
- News & Updates — WhiskAILabs
Official External Sources: