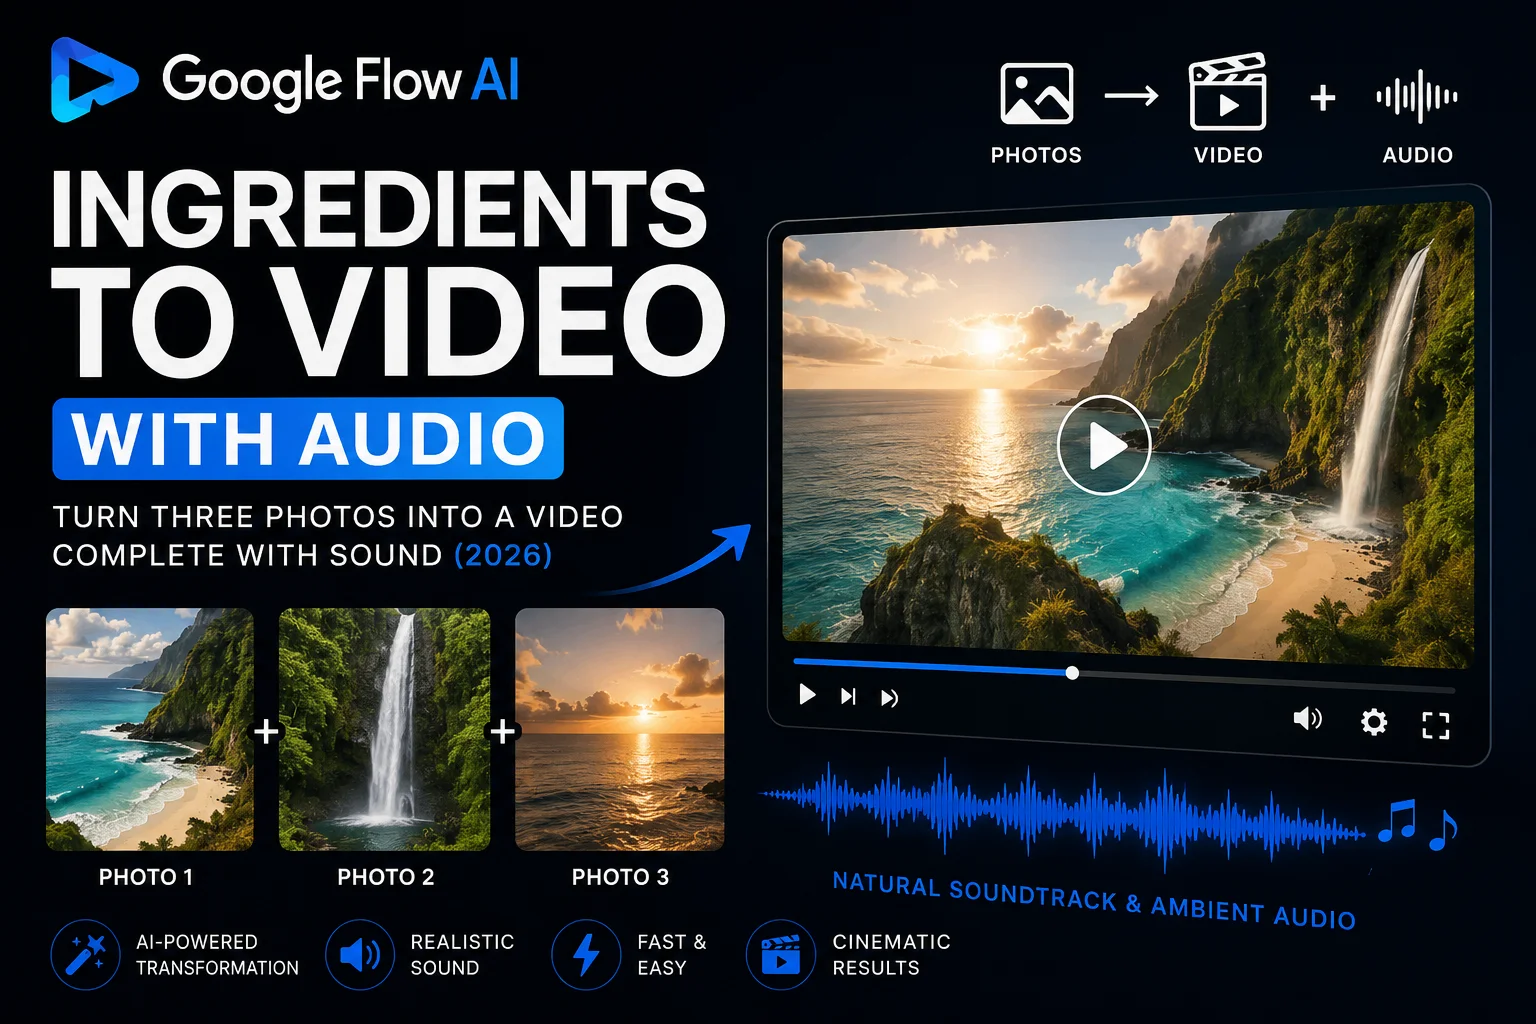
Ingredients to Video with Audio: The Best Google Flow AI Feature You Must Try (2026 Guide)
Here’s something most people don’t realize about Google Flow AI: the single most powerful thing it can do isn’t writing a prompt and hitting generate.
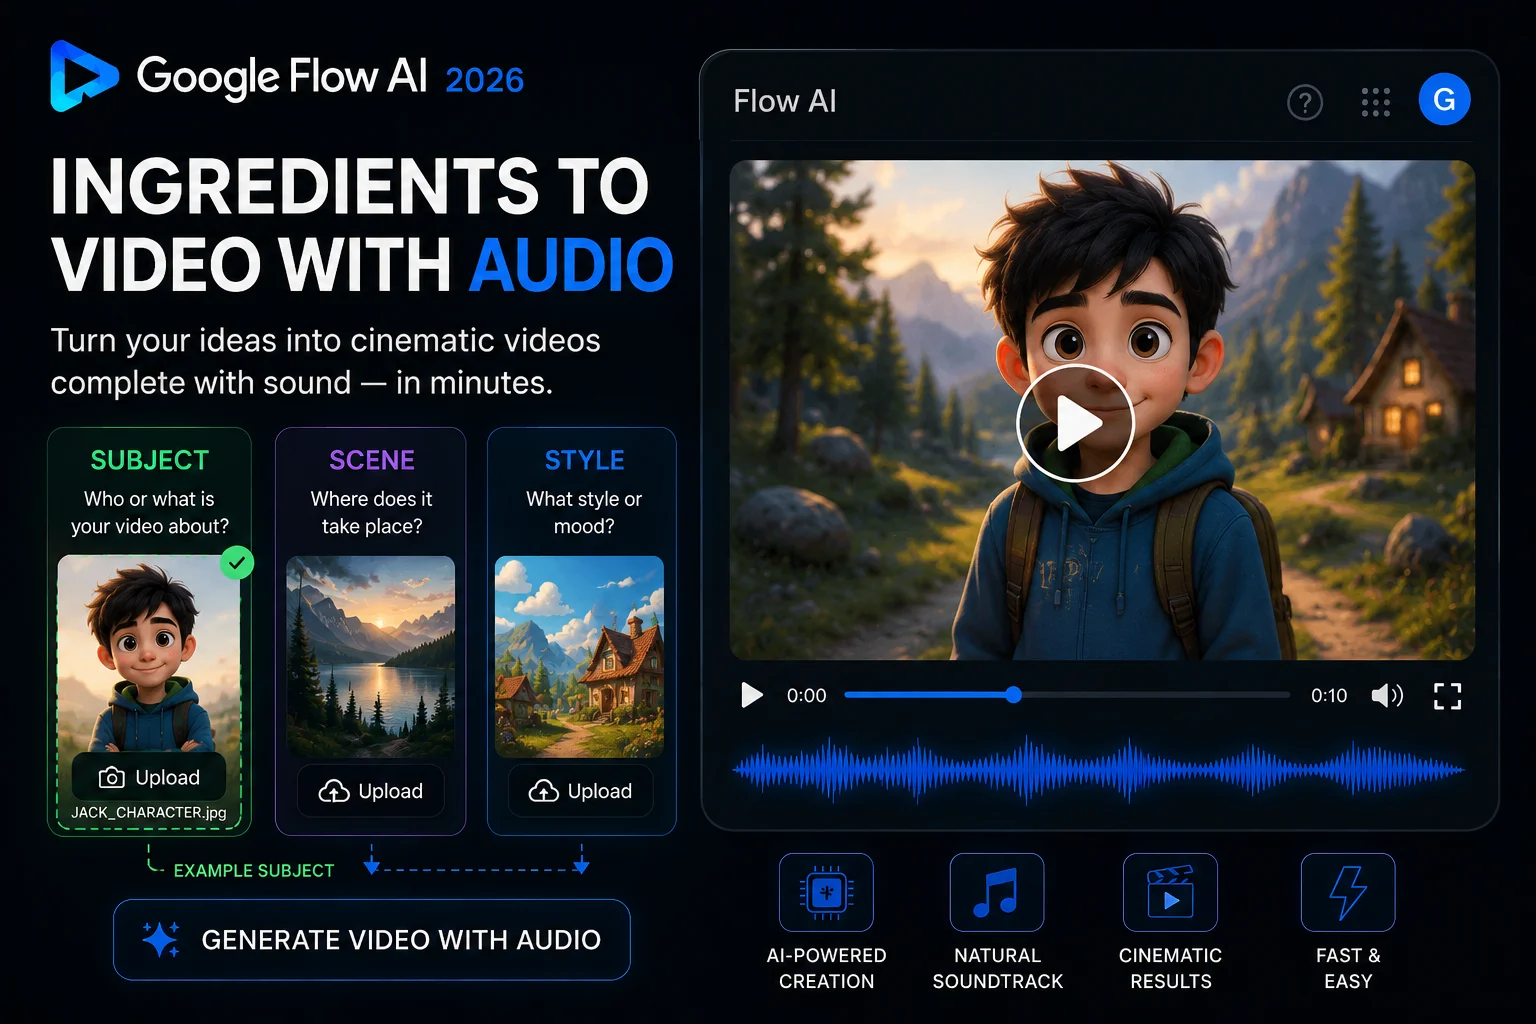
It’s uploading three photos — a Subject, a Scene, and a Style — and watching the AI turn them into a moving, breathing video clip with full synchronized audio. No editing software. No separate music step. No technical skills needed.
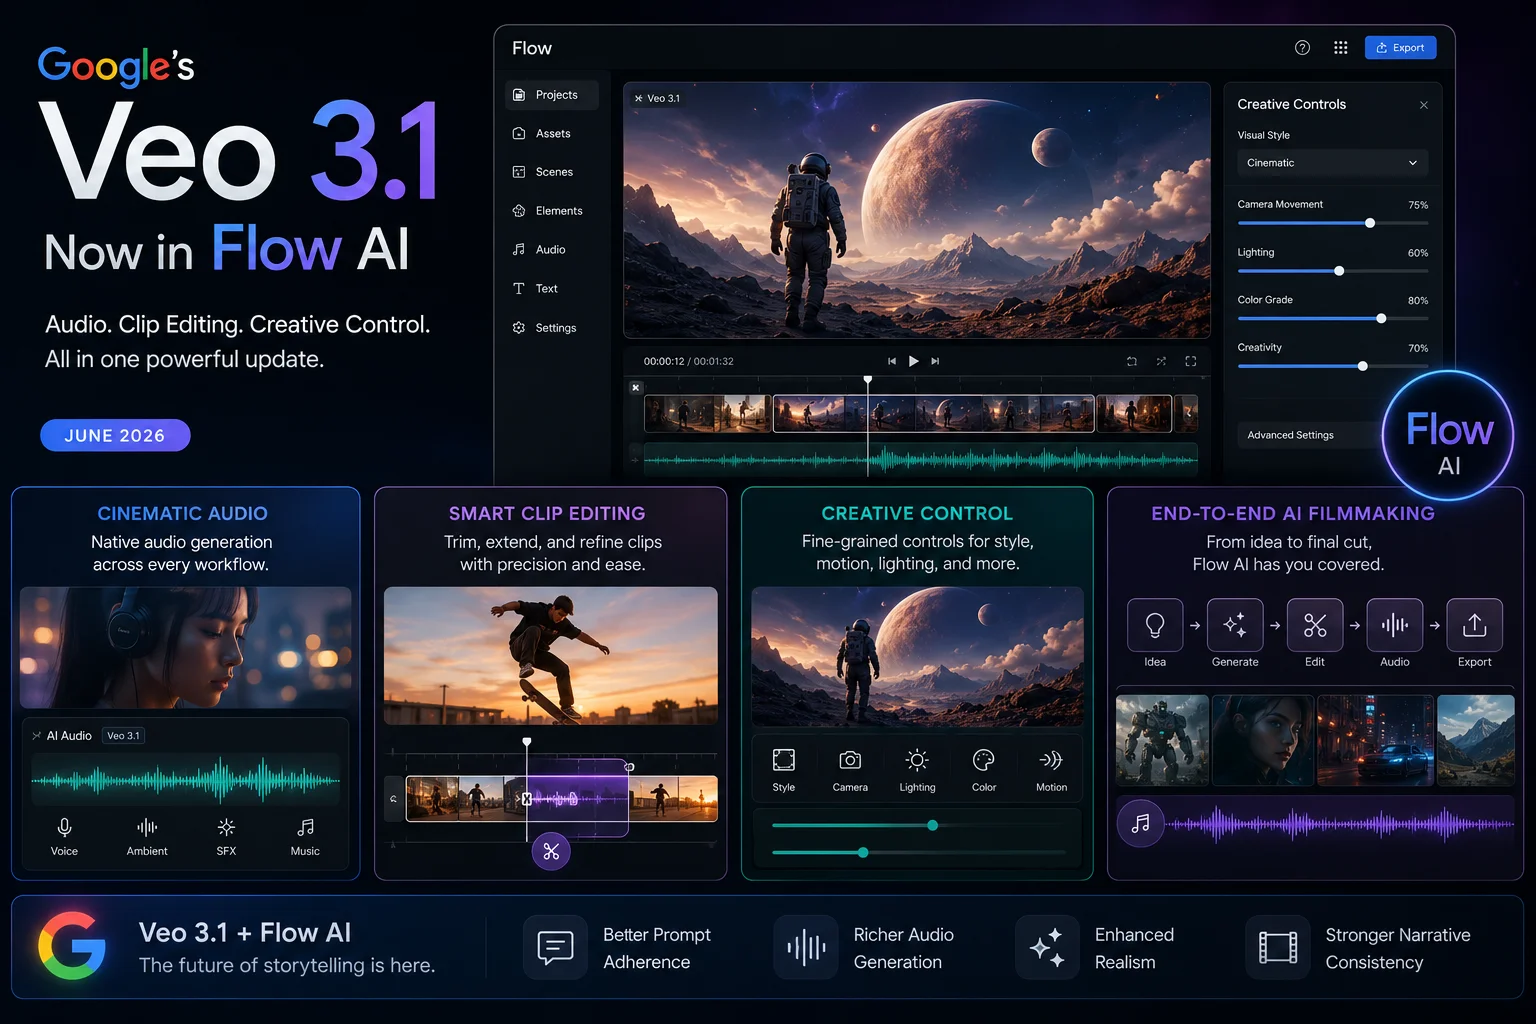
That feature is called Ingredients to Video with Audio, and as of the Veo 3.1 update released in 2026, it now generates complete video AND sound in a single step.
This complete guide to Ingredients to Video with Audio covers everything — what the feature actually is, how it works under the hood, exactly how to use it step by step, what kinds of results to expect, and how to get the best outputs possible. By the end, you’ll understand Ingredients to Video with Audio better than most people who’ve been using Flow AI for months.
Let’s start from the beginning.
What Is the Ingredients Workflow? (And Where Did It Come From?)
Before we talk about video and audio, it helps to understand where the “Ingredients” concept came from — because it’s the heart of one of the most beloved AI tools ever made.
The Ingredients system was originally built inside Google Whisk AI — a tool that launched in December 2024 and became instantly popular for one specific reason: it let you take three separate images and blend them together into something completely new.
The three inputs were called Subject, Scene, and Style. You uploaded:
- A Subject — the main character or object you wanted in the result
- A Scene — the background or environment
- A Style — the visual aesthetic or art direction
Whisk AI would then use Google’s AI models to reinterpret all three together and generate a new image that combined elements from each. It wasn’t a simple overlay or collage — the AI actually understood what each ingredient represented and synthesized them into something coherent.
People used it to create:
- Fantasy portraits of themselves in fictional worlds
- Brand character illustrations in custom art styles
- Storybook images for children
- Product visualizations in creative environments
It was wildly creative and surprisingly easy to use. The problem was that Whisk AI only made images — no video, no audio.
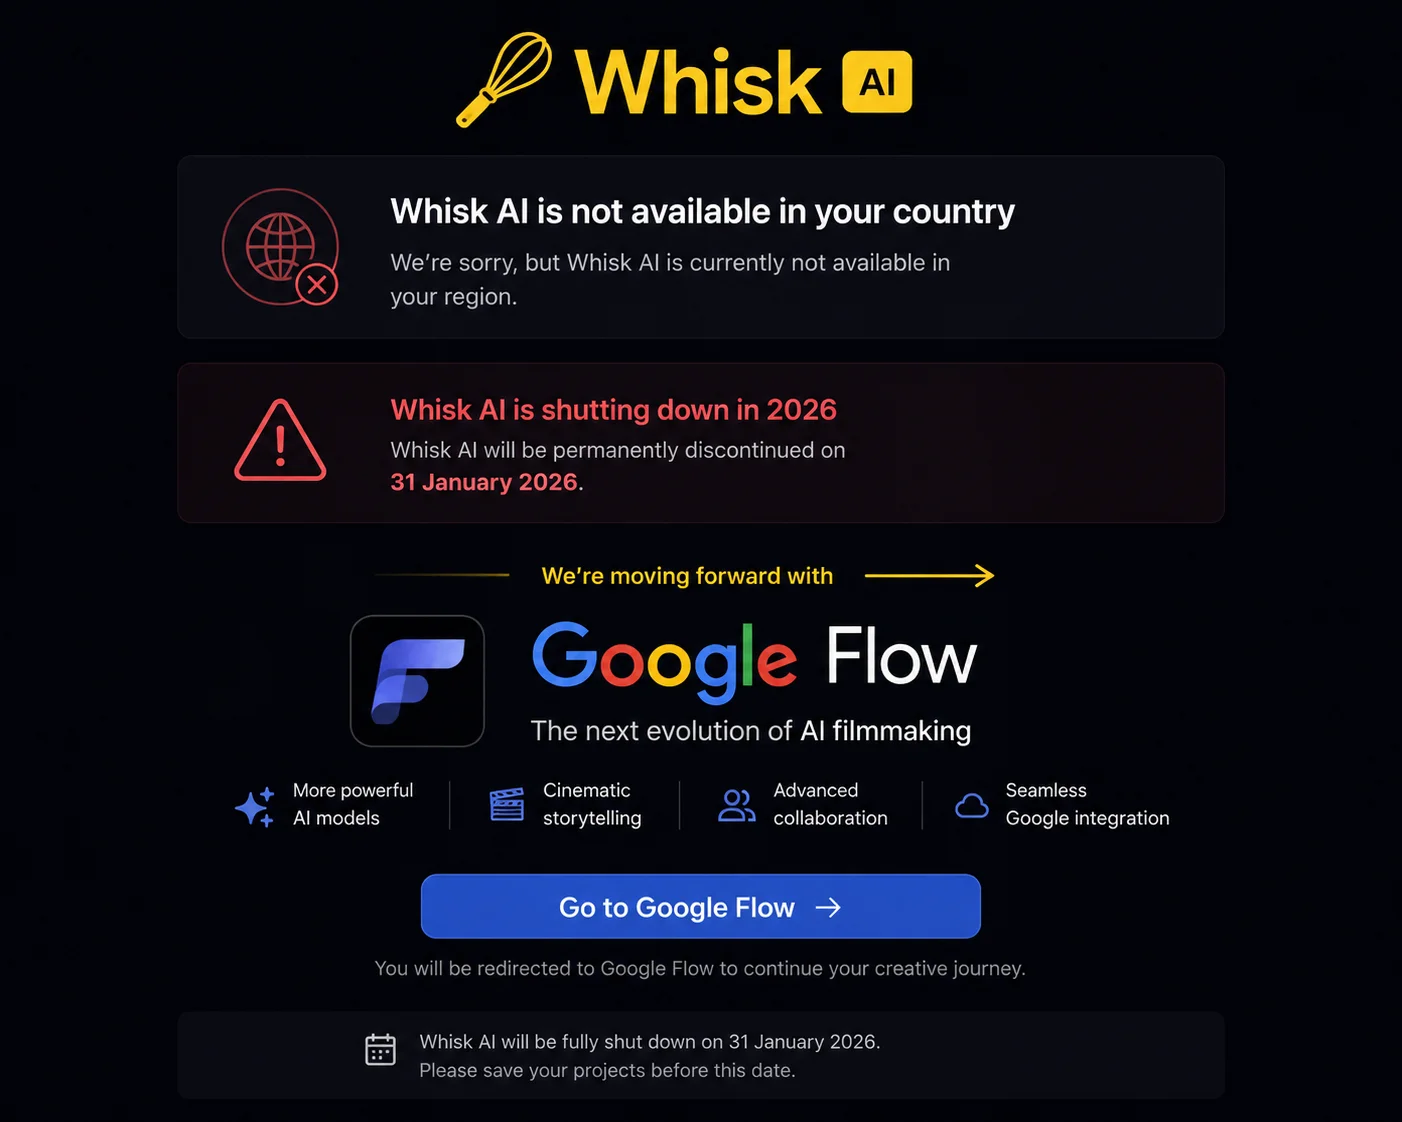
Then Google Whisk AI shut down on April 30, 2026, and everything moved into Google Flow AI. The Ingredients workflow came with it — and this time, it came with video and sound built in.
What Is “Ingredients to Video with Audio” Exactly?
Ingredients to Video with Audio is the evolved version of the Ingredients workflow inside Google Flow AI. It takes your three uploaded images — Subject, Scene, and Style — and generates not just a still image but a complete video clip with synchronized audio.
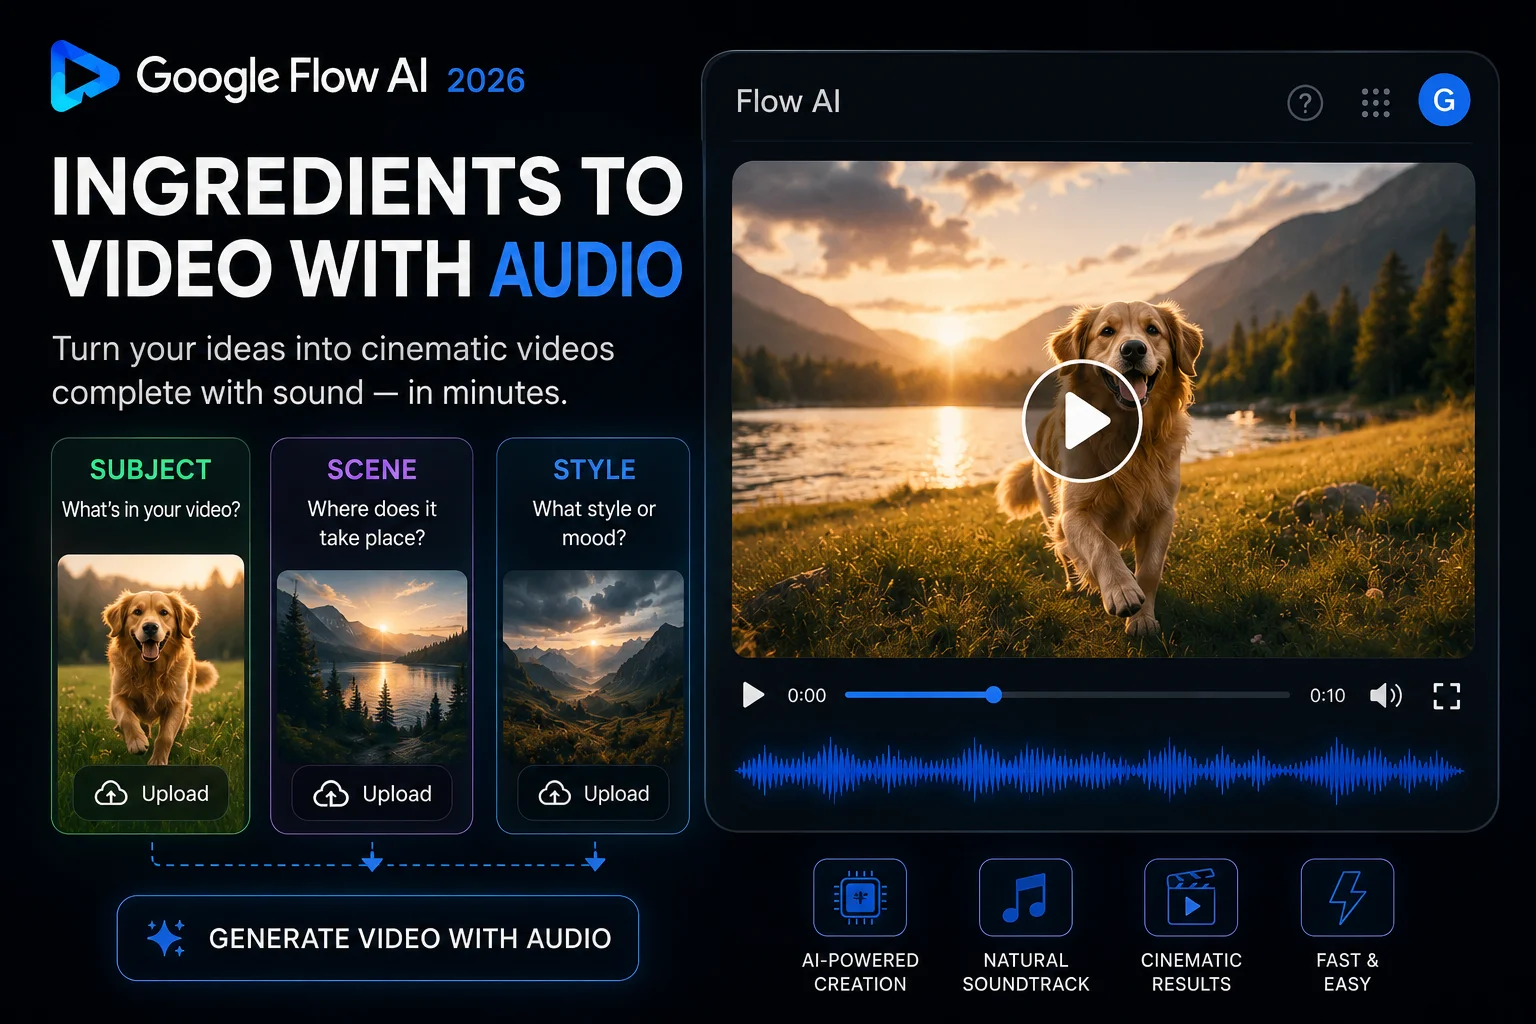
Here’s what “synchronized audio” means in practical terms: the AI doesn’t just add random background music to your video. It generates sound that actually matches what’s happening on screen. If your Subject is walking through your Scene — a forest, say — you’ll hear footsteps, wind through trees, birds in the distance. If your Subject is in a kitchen environment, you might hear ambient kitchen sounds. If your Style reference is dramatic and cinematic, the audio mood matches that tone.
The sound comes from Veo 3.1, Google DeepMind’s latest video generation model, which understands the visual context of each frame and generates audio that responds to it. This is the same audio intelligence that powers all of Flow AI’s video generation — now applied to the Ingredients workflow specifically.
What this means for you: you upload three photos, click generate, and get back a video that looks and sounds like something that took real production effort to make. That’s the core promise of this feature, and in most cases, it delivers on it.
Why This Feature Matters — The Before and After
To understand why Ingredients to Video with Audio is such a significant thing, it helps to see the contrast with what came before.
Before (Whisk AI, image-only):
- Upload Subject + Scene + Style
- Get a still image back
- If you wanted video, you had to export the image and take it to a separate video tool
- If you wanted audio, you had to find royalty-free music separately and edit it in
- The whole process required at minimum 2-3 different tools
After (Flow AI, Ingredients to Video with Audio):
- Upload Subject + Scene + Style
- Get a video clip with synchronized audio
- Download and use directly — no additional tools needed
- Total additional time: zero
That’s not a minor convenience improvement. For content creators, social media managers, teachers, marketers, and anyone making visual content without a production team, this collapses a multi-step workflow into a single action.
What You Need Before You Start
Let’s get practical. Here’s what you need to use Ingredients to Video with Audio:
A Google account. Personal Gmail works best. School or work accounts (Google Workspace) may have restrictions.
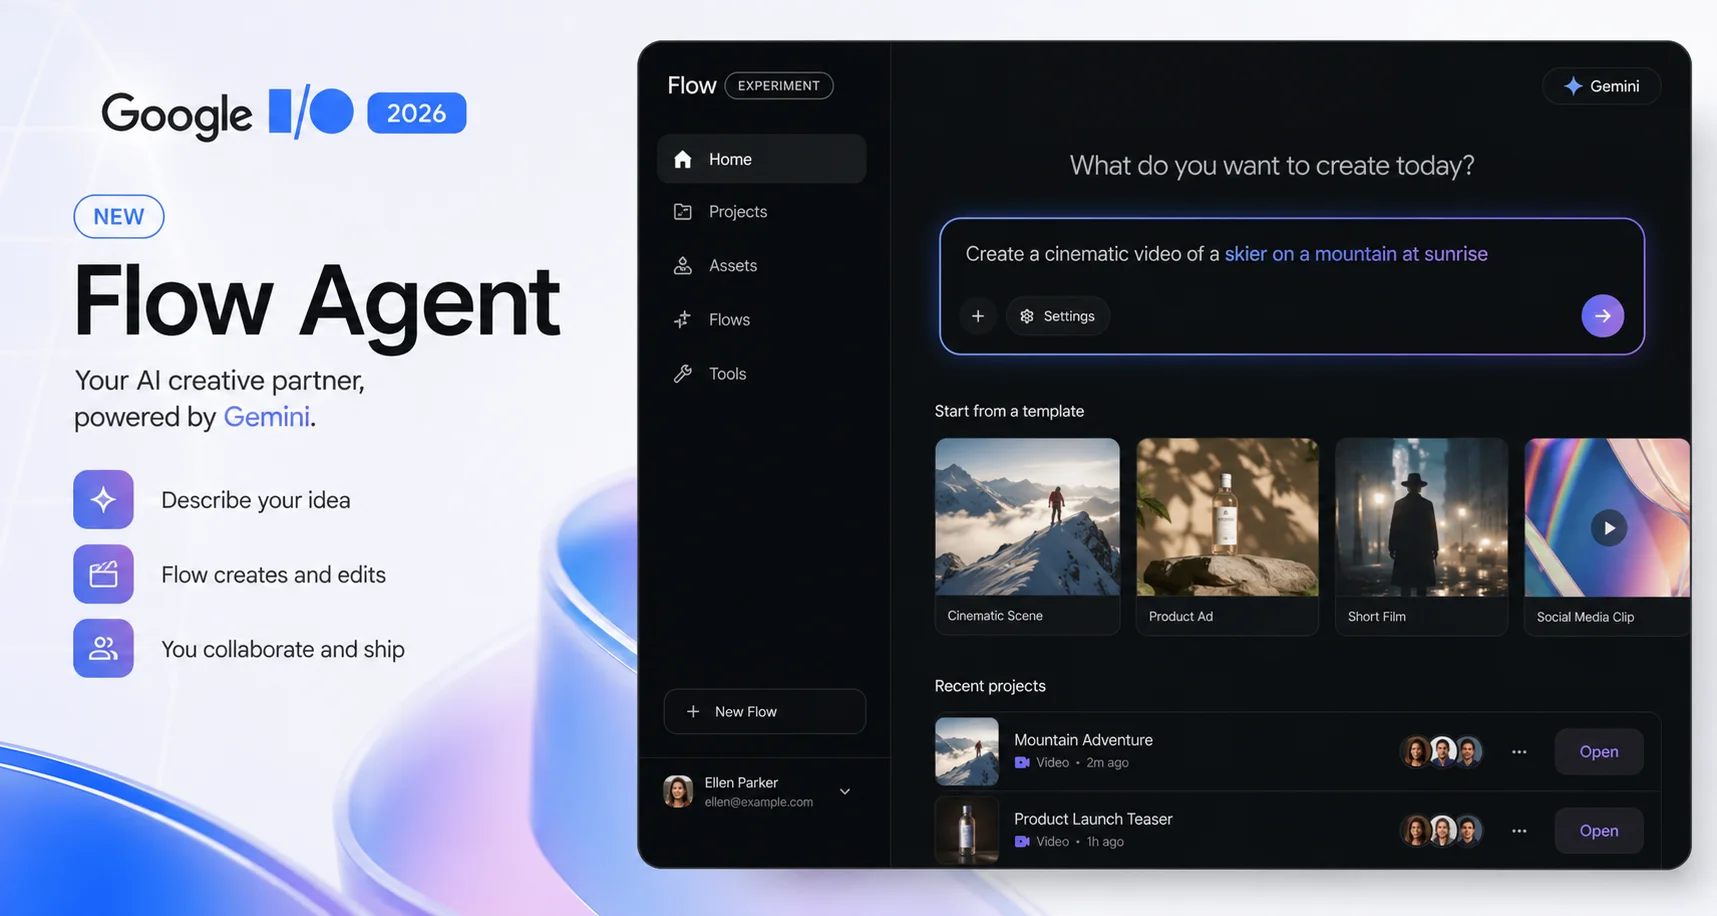
Access to Google Flow AI. Go to flow.google in your browser. This is the official home of the tool.
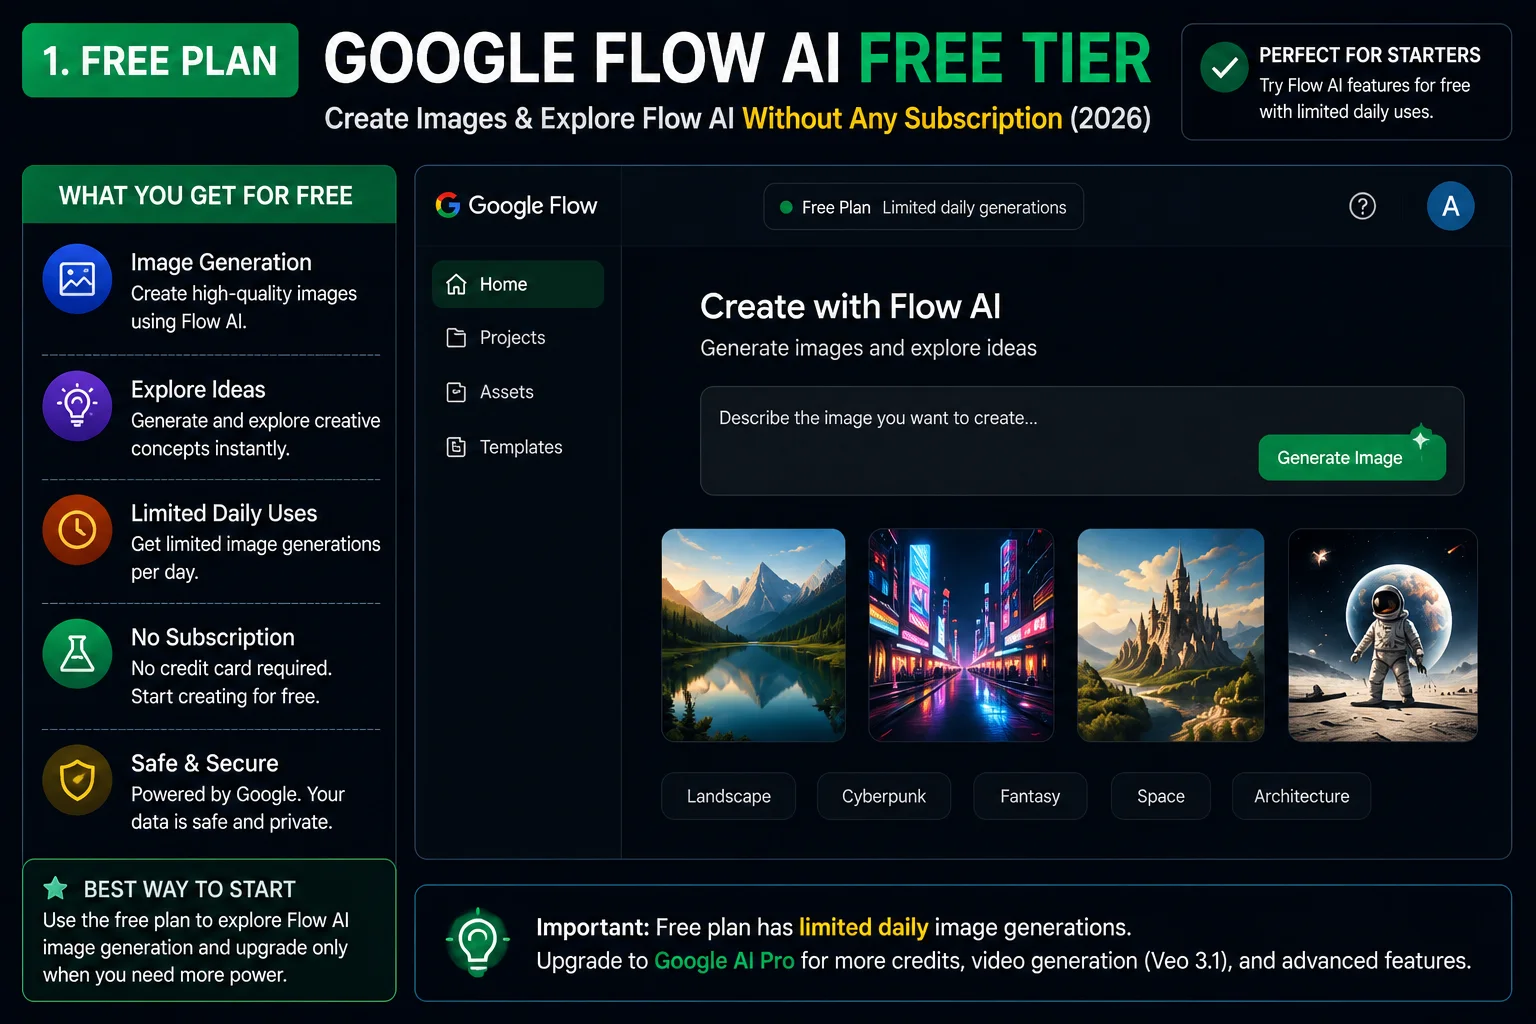
A Google AI Plus subscription for video. Image generation through Ingredients is free. Video generation — including Ingredients to Video with Audio — requires Google AI Plus at $19.99/month (approximately Rs. 1,400/month in Pakistan). If you’re not sure which plan you have, check under your account settings.
Three images to use as ingredients. These can be photos from your camera roll, images you’ve saved from the internet, or even screenshots. The quality of your inputs directly affects the quality of your output — we’ll cover what makes a good ingredient photo later in this guide.
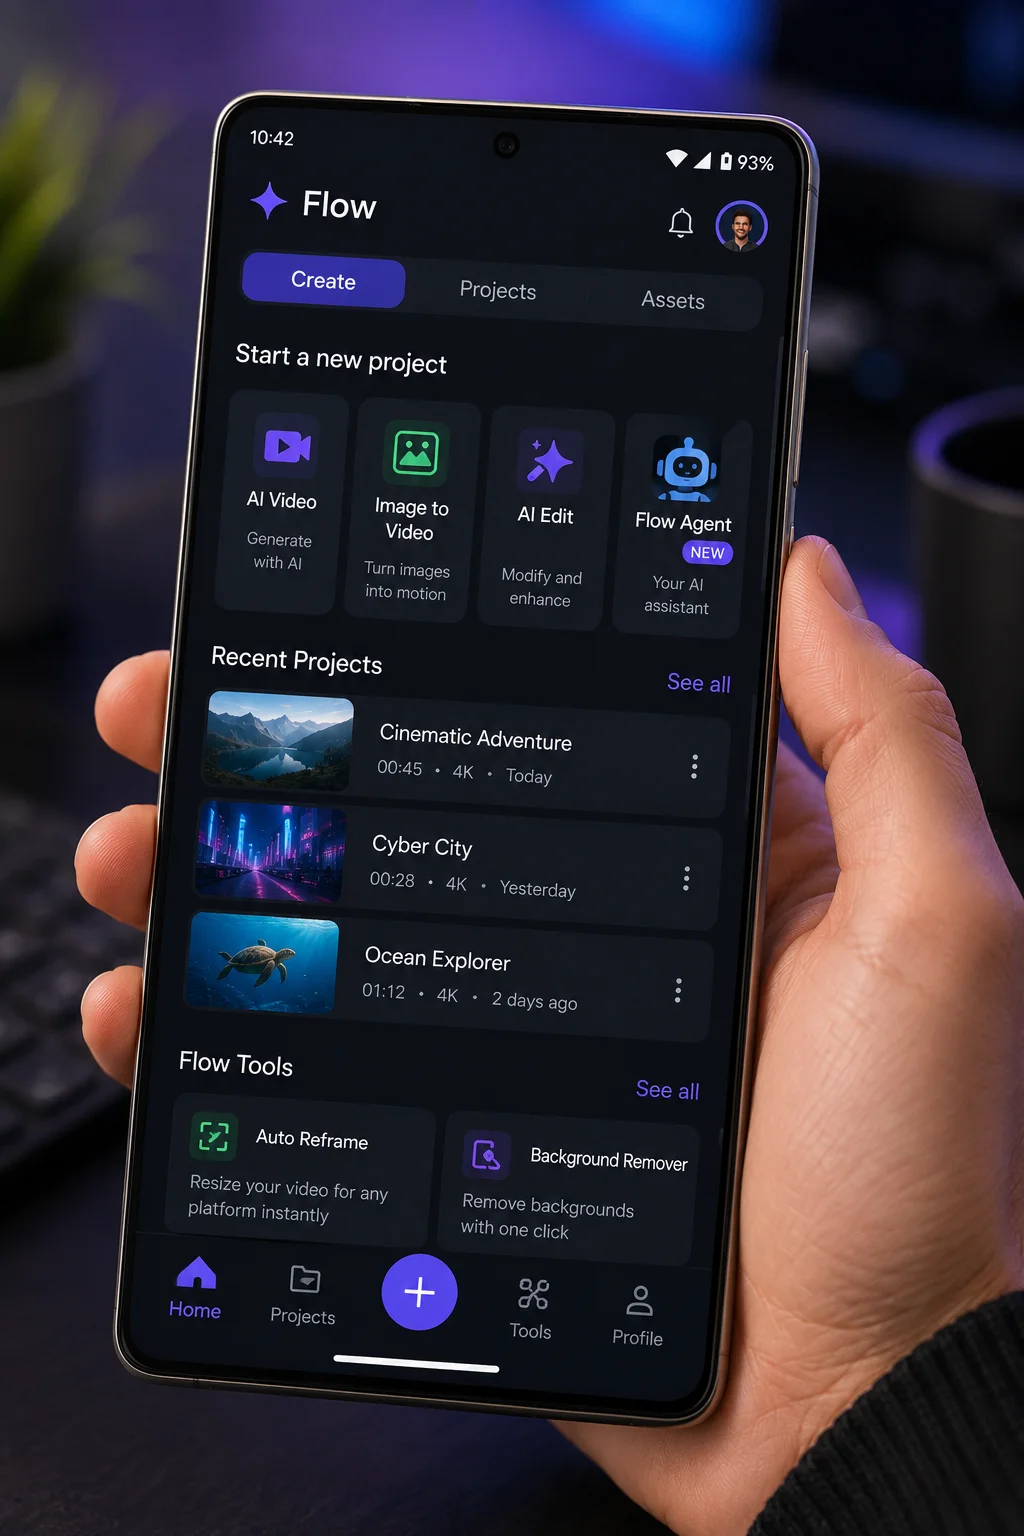
A computer or phone. The Google Flow AI mobile app is now available after the I/O 2026 launch, so you can use Ingredients to Video on your phone as well as on desktop.
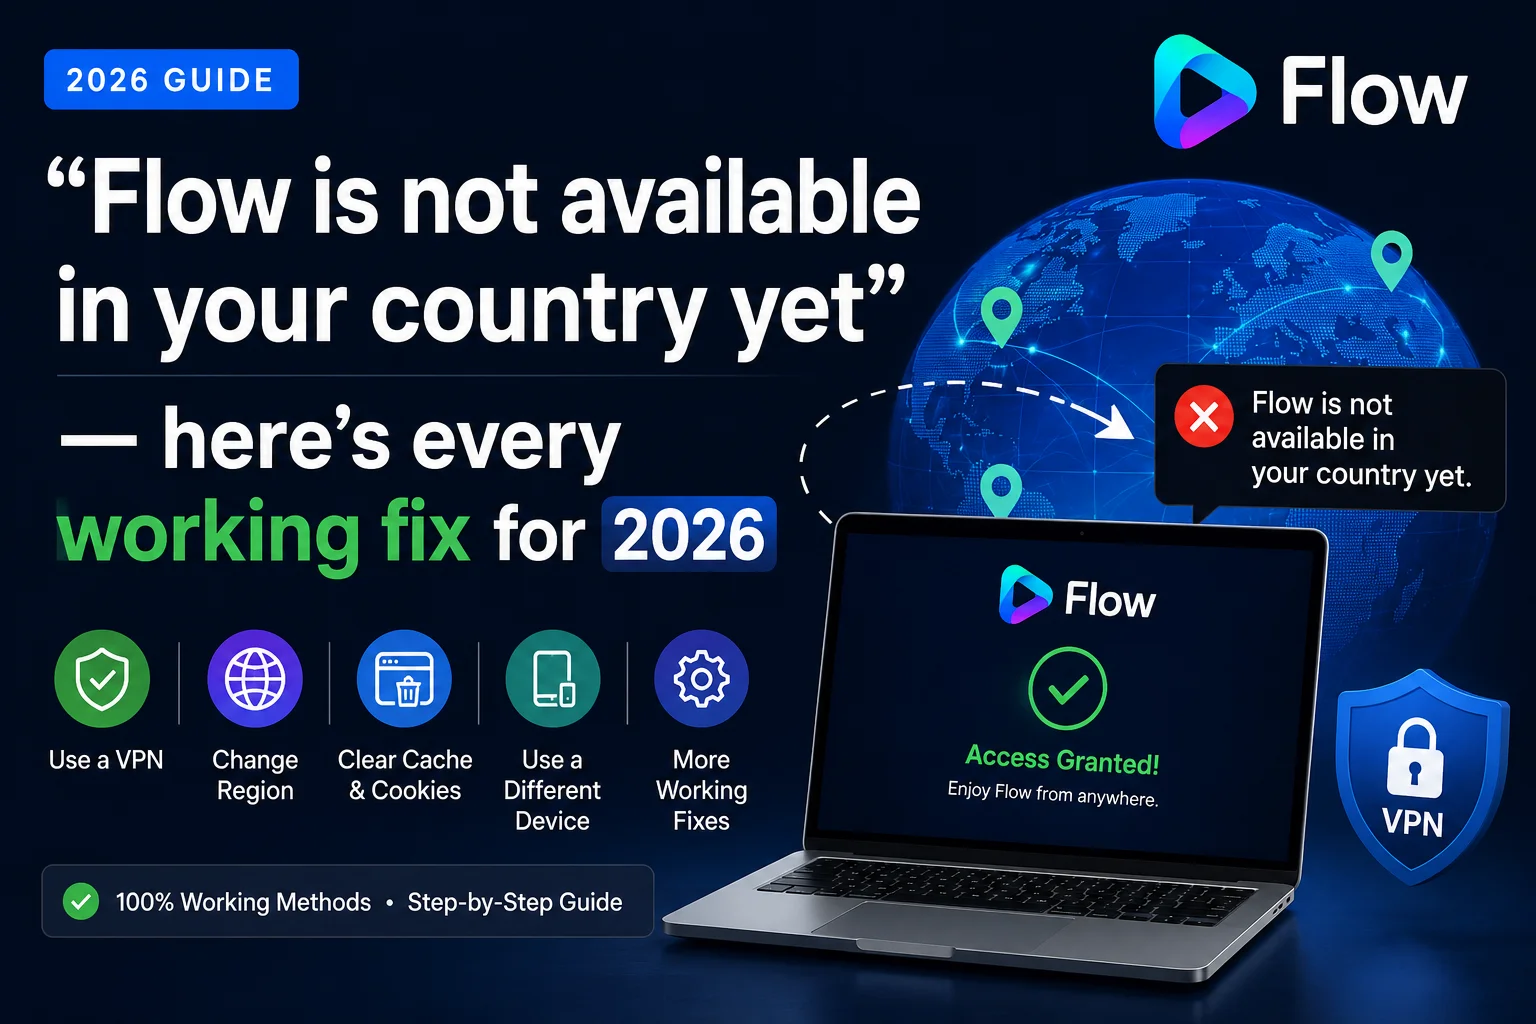
If you’re in Pakistan and having trouble accessing Flow AI, our Pakistan access and troubleshooting guide walks through every common issue including regional restrictions and payment options.
Step-by-Step: How to Use Ingredients to Video with Audio
Here is the complete process from opening the tool to downloading your finished video clip.
Step 1: Open Google Flow AI and Go to Ingredients Mode
Open flow.google in your browser (or open the Flow AI mobile app).
Sign in with your Google account if you aren’t already logged in.
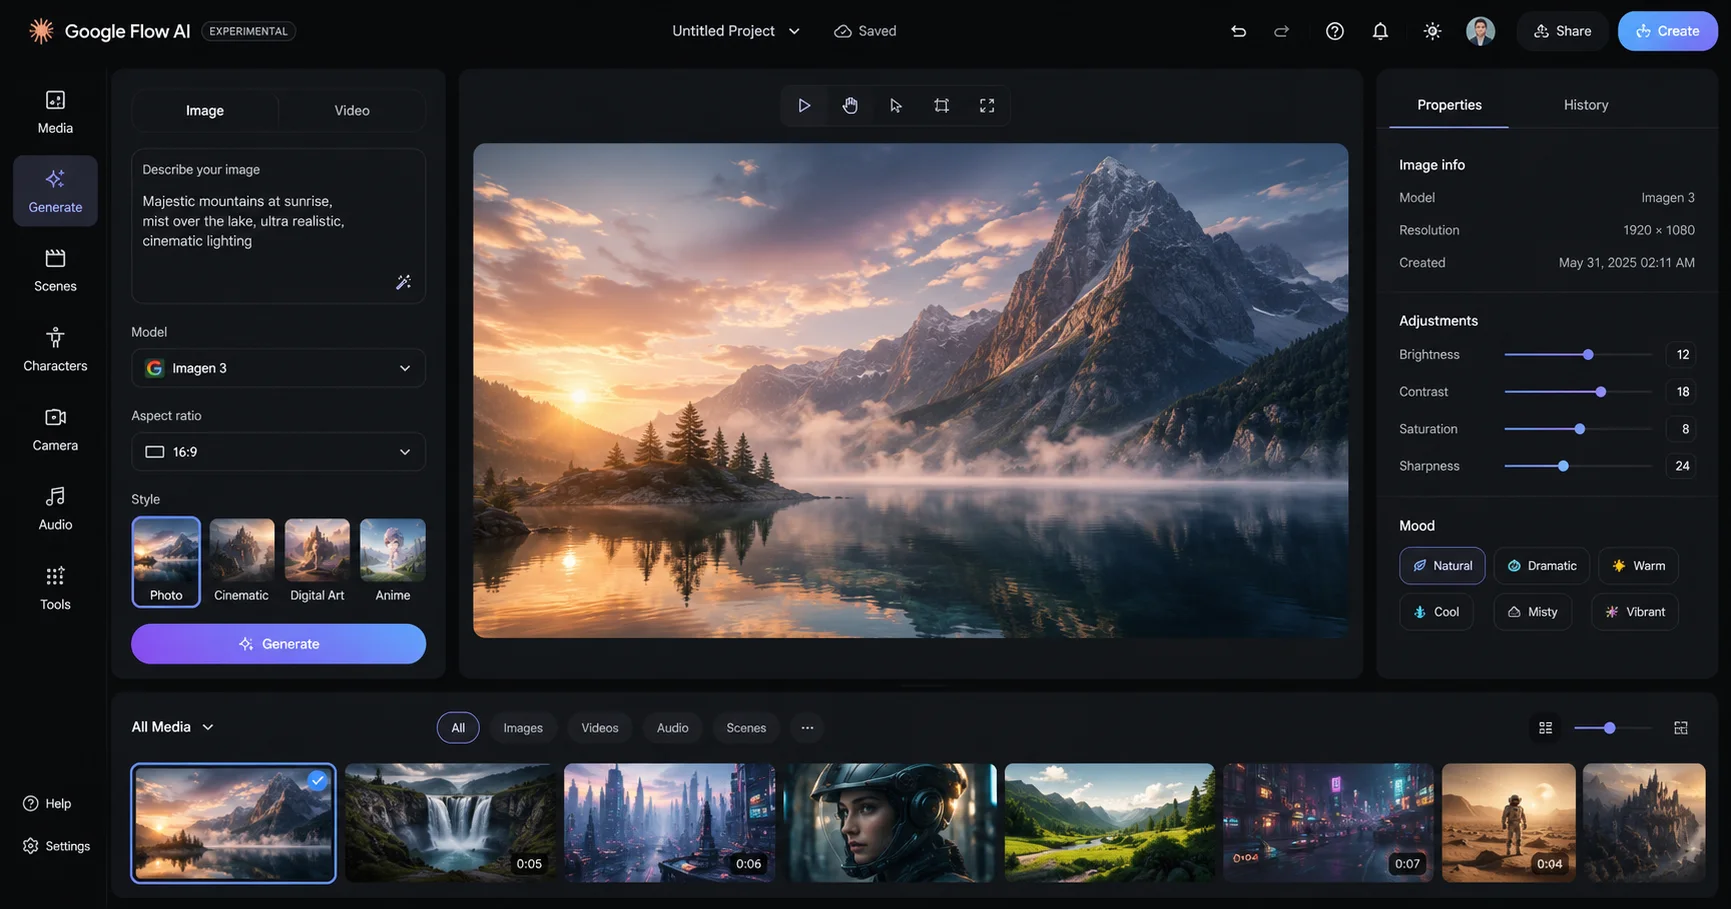
On the main interface, look for the Ingredients option. In Flow AI’s current interface, this appears in the sidebar or as a tab near the main creation area. It may be labeled “Ingredients” directly or represented by the three-slot input panel.
Click to open the Ingredients panel. You’ll see three upload areas: Subject, Scene, and Style.
Step 2: Upload Your Subject
The Subject is your main character or the central object in your video. This is who or what the video will be about.
Click the Subject slot and upload your image.
What makes a good Subject photo:
- Clear, uncluttered background. A photo of a person against a plain wall or solid background works much better than one with a busy background. The AI needs to clearly identify the Subject.
- Good lighting. Well-lit photos produce better results. Avoid dark, grainy, or backlit images.
- Face or object clearly visible. If your Subject is a person, make sure their face is visible and not obscured. If it’s an object, make sure the whole object is in frame.
- Single clear focal point. One person or one object works better than group photos where the AI has to guess which element is the main Subject.
Common Subject ideas:
- A photo of yourself or a family member
- A pet (cats and dogs work especially well)
- A product you want to showcase
- A toy, figurine, or collectible
- A fictional character you’ve drawn or photographed
Step 3: Upload Your Scene
The Scene is your background — the world your Subject will exist in.
Click the Scene slot and upload your image.
What makes a good Scene photo:
- Environment, not objects. Your Scene should be a place, not a thing. A forest, a city skyline, a beach, a cozy library, a futuristic corridor — these are good Scenes. A photo of a chair is not a great Scene.
- Atmosphere matters. The mood of your Scene photo carries into the video. A moody, foggy forest creates a different result than a bright, sunny meadow — even with the same Subject.
- Depth and space. Scenes with visible depth (foreground, midground, background) tend to produce more cinematic video results than completely flat backgrounds.
- You can use places you’ve actually photographed. A photo of your garden, your neighborhood street, or a location from a trip all work as Scene inputs.
Common Scene ideas:
- A magical forest or nature landscape
- A fantasy castle or medieval environment
- A modern city at night with neon lights
- A cozy indoor environment (library, café, cabin)
- A dramatic sky or weather scene
- A beach at golden hour
- An underwater environment
- A futuristic or sci-fi setting
Step 4: Upload Your Style
The Style is your visual aesthetic reference — the art direction and look you want applied to the final output.
Click the Style slot and upload your image.
What makes a good Style reference:
- Visual art or illustration works best. Paintings, illustrations, comic art, concept art, graphic novel panels — these are ideal Style references because they have a strong, distinct visual character.
- Photography styles also work. Film photography, cinematic stills, fashion photography, or any photo with a distinct visual identity can serve as a Style reference.
- The more distinctive the style, the stronger the effect. A blurry, generic photo won’t push the output in any particular direction. A vivid watercolor painting or a bold graphic novel style will clearly shift the aesthetic.
- Match your intention. If you want a dark, dramatic output — use a dark, dramatic Style reference. If you want something playful and colorful — use a bright, cartoon-style reference.
Common Style ideas:
- Studio Ghibli animation frames (soft, warm, hand-painted)
- Oil painting portraits (classic, textured)
- Cyberpunk concept art (neon, dark, high contrast)
- Watercolor illustrations (soft, flowing, painterly)
- Pixar-style 3D animation (polished, expressive)
- Vintage film photography (grainy, warm tones)
- Graphic novel / comic art (bold lines, flat colors)
- Ink wash paintings (minimalist, East Asian aesthetic)
Step 5: Enable Audio and Switch to Video Mode
This is the step most people miss — and why they end up with a silent video.
Before generating, make sure you are in Video mode, not Image mode. Look for a toggle or mode selector near the generate button. Switch it to Video.
Then, confirm that Audio is enabled. In Flow AI’s current interface, audio generation is on by default in video mode, but it’s worth checking the settings panel to confirm. You should see an audio toggle or indicator showing that sound will be generated with your video.
You can also add an optional text prompt at this stage. This isn’t required — the three ingredients alone are enough for the AI to generate something — but adding a brief description of what you want to happen in the video helps guide the result.
Example prompt additions:
- “Walking slowly through the forest, peaceful and cinematic”
- “The character turns and looks toward the camera, golden hour lighting”
- “A dramatic reveal, camera slowly pulling back”
Keep your prompt additions short and action-focused. The ingredients already carry the visual information — your text prompt should describe what happens, not describe the visuals (the visuals come from your images).
Step 6: Generate and Review
Click Generate.
Video generation with audio takes longer than image generation — typically 45 seconds to 2 minutes depending on server load and complexity. Don’t close the tab or navigate away during generation.
When your video is ready, it will appear in your creations panel. Click to play it and immediately unmute — the audio is the thing you want to experience first with this feature.
Reviewing your result — what to look for:
- Does the Subject appear clearly in the video? (If not, your Subject photo may have been too cluttered or poorly lit)
- Does the Scene environment look like your reference? (It doesn’t need to be identical — the AI reinterprets, it doesn’t copy)
- Does the Style come through in the visual treatment? (Lighting, color palette, texture)
- Does the audio match the mood and content of what’s happening on screen?
If you’re happy with the result, proceed to download. If not, see the section below on refining your outputs.
Step 7: Download Your Video
Click the download button on your generated video (usually a downward arrow icon). Your video will download as an MP4 file, ready to use on any platform.
Platform recommendations by aspect ratio:
- YouTube standard video: 16:9 (landscape)
- YouTube Shorts / Instagram Reels / TikTok: 9:16 (vertical)
- Instagram square post: 1:1
You can set your preferred aspect ratio before generating in the settings panel. If you’re making content for multiple platforms, generate separate versions at different ratios rather than cropping after the fact.
How to Get Better Results — Tips From Real Testing
Generating something decent with Ingredients to Video is easy. Generating something you’re genuinely proud of takes a bit more understanding of how the AI thinks. Here are the techniques that actually make a difference.
Use high-contrast, clean ingredient photos. The AI separates and reinterprets each ingredient — it doesn’t just blend three photos together directly. The cleaner and more distinct each input, the more clearly the AI understands what you’re asking for.
Match the mood across all three ingredients. Your best results come when Subject, Scene, and Style all point toward the same emotional tone. A bright, cheerful Subject photo + a dark, stormy Scene + a gritty noir Style reference creates internal conflict for the AI. A warm Subject + a golden landscape + a painterly impressionist Style creates a coherent, beautiful result.
Use your text prompt to describe action, not appearance. The images already tell the AI what things look like. Use your optional text prompt to tell it what’s happening: “the character walks slowly toward a glowing doorway” or “camera pans across the landscape at dawn.”
Generate multiple variations. Flow AI typically gives you 4 variations of each generation. Don’t judge the feature by just one result — look at all four and pick the best one. The difference between variations can be significant.
Try different Style references for the same Subject and Scene. Swapping just the Style image while keeping Subject and Scene the same is one of the fastest ways to explore creative directions. The same forest scene with a Studio Ghibli style vs a dark fantasy concept art style produces dramatically different outputs.
Save your best ingredients. Flow AI lets you save Subject and Style references to your Ingredients library so you can reuse them across multiple generations. If you’ve found a Subject photo that consistently gives great results, save it. If you have a Style reference that always produces beautiful outputs, keep it in your library.
For more prompt strategies that apply across all of Flow AI’s generation modes, see our Whisk AI prompts guide and advanced prompt engineering guide.
Creative Use Cases — What People Actually Make With This
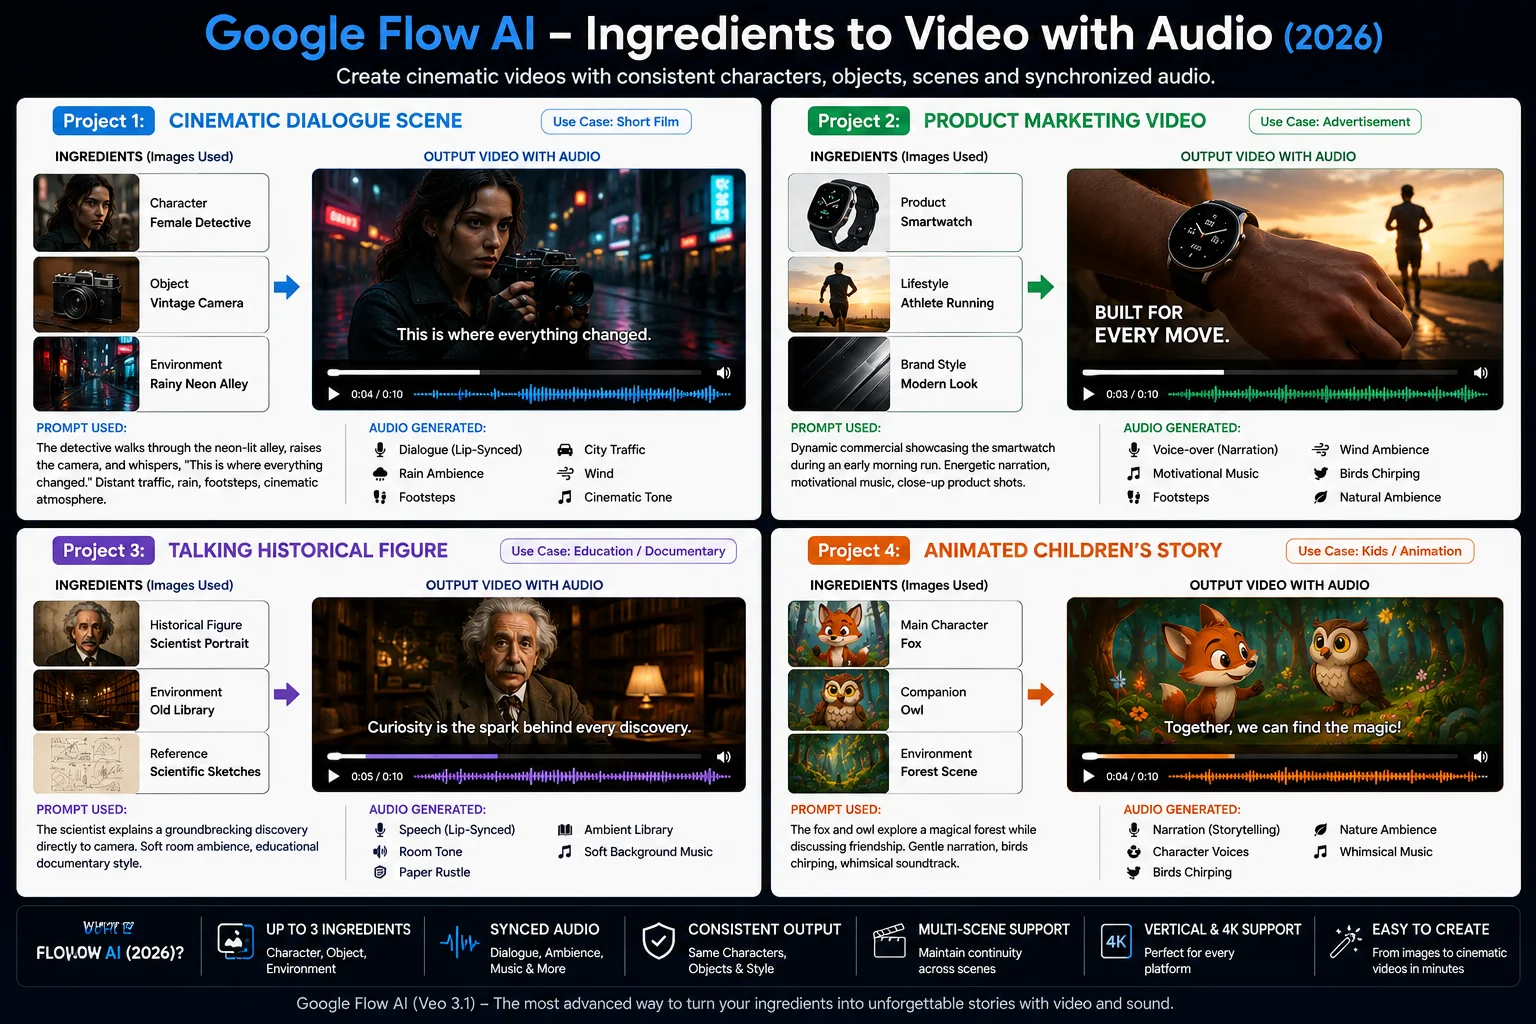
Here are some of the most effective ways creators are using Ingredients to Video with Audio right now:
Custom character animations for storytelling. Upload a photo of an original character (drawn or photographed), a fantasy scene, and an animated film style. Use the resulting video clips to build short animated stories or character introductions.
Product showcase videos. Upload a product photo as Subject, a lifestyle environment as Scene (a kitchen for food products, a desk setup for tech products, an outdoor setting for sports products), and a clean commercial photography style. The result is a polished, dynamic product clip that works for ads and social media without requiring a video shoot.
Personalized content for kids. Upload a photo of a child as Subject, a magical storybook environment as Scene, and a children’s illustration style. Parents and educators use this to create personalized story illustrations and short clips that feature the actual child as the main character.
Travel and tourism content. Upload a portrait photo as Subject, a destination environment as Scene, and a cinematic travel film style. Content creators use this to imagine themselves in destinations they haven’t visited — or to create content set in real locations they have visited but want to present in a more cinematic way.
Music video concepts. Upload an artist photo as Subject, a stage or atmospheric environment as Scene, and a cinematic concert photography style. Musicians use this to create concept visuals for songs before committing to a full production shoot.
Educational content. Upload a relevant character or object as Subject, a historically or scientifically accurate environment as Scene, and an illustrative style. Teachers and educators use this to create engaging visual content for lessons without needing stock footage or production budgets.
Ingredients to Video vs Text-to-Video — Which Should You Use?
Flow AI also lets you generate video purely from a text prompt, without uploading any images. So when should you use Ingredients to Video specifically, rather than just typing a description?
Use Ingredients to Video when:
- You have a specific character or subject whose appearance matters and needs to be preserved
- You want a specific visual environment that’s hard to describe in words
- You want a specific art style or aesthetic that’s easier to show than describe
- You’re building a series of clips featuring the same recurring character or setting
- You want to personalize content with real photos (of yourself, your product, your pet, etc.)
Use Text-to-Video when:
- You’re exploring ideas and don’t have specific image references yet
- Your concept is abstract or atmospheric rather than character-driven
- You want maximum creative freedom without being anchored to specific images
- You’re generating background footage, landscape clips, or abstract visual content
Many creators use both approaches in the same project — using Ingredients to Video for scenes featuring their main character, and text-to-video for establishing shots, background clips, or transition sequences.
For a complete guide to text-to-video generation in Flow AI, see our Google Flow AI Tutorial.
Understanding the Audio — What It Generates and Why
The audio component of Ingredients to Video deserves its own explanation because it works differently from what most people expect.
Veo 3.1 doesn’t have a separate “pick your background music” step. It doesn’t choose from a library of stock tracks. Instead, it generates original audio specifically for each video it creates — synthesized sound that responds to the visual content of each frame.
What this generated audio includes:
Ambient environmental sound — The sonic environment of your Scene. A forest Scene generates wind, birds, leaves rustling. A city Scene generates distant traffic, crowd murmur, urban ambience. An underwater Scene generates the muffled, pressure-heavy quality of underwater audio.
Action-responsive sound — If your Subject is moving in a particular way in the generated video, the audio responds. Walking generates footsteps that match the surface. Running generates faster, more urgent sound. A dramatic reveal generates a tonal shift in the audio.
Mood and tone matching — The Style reference doesn’t just affect the visuals. A dark, moody Style reference tends to produce darker, more tense audio. A bright, cheerful Style produces warmer, lighter sound. The AI reads aesthetic cues across all three ingredients when generating audio.
Dialogue (when applicable) — If your generated video includes a character whose mouth appears to be speaking, Veo 3.1 can generate plausible dialogue or vocal sounds that match the visible lip movement. This is most effective with clear, well-lit Subject photos where facial features are clearly visible.
One important note: The audio is generated fresh with each video. Two generations from the same ingredients will produce similar but not identical audio. If you particularly love the audio from one generation but want slightly different visuals, you can’t currently separate and reuse the audio from a previous generation — each generation is a complete, unified output.
Troubleshooting Common Problems
My Subject doesn’t look right in the video The most common cause is a Subject photo with a cluttered or busy background. The AI has trouble isolating the Subject from a complex background. Try a photo of your Subject against a plain, solid-colored background. If possible, a photo taken in good natural light with the Subject clearly foregrounded works best.
The Style isn’t coming through strongly Try a Style reference with a more distinctive, recognizable aesthetic. Generic or low-contrast photos won’t push the output in a clear direction. A bold painting, a distinctive illustration style, or a photo with a very specific and recognizable treatment will have a much stronger effect.
The audio doesn’t match the visual This is relatively rare with Veo 3.1, but it can happen with very abstract or contradictory ingredient combinations. Try making your ingredients more tonally consistent — if the audio feels off, it often reflects a mismatch in mood between your Subject, Scene, and Style references.
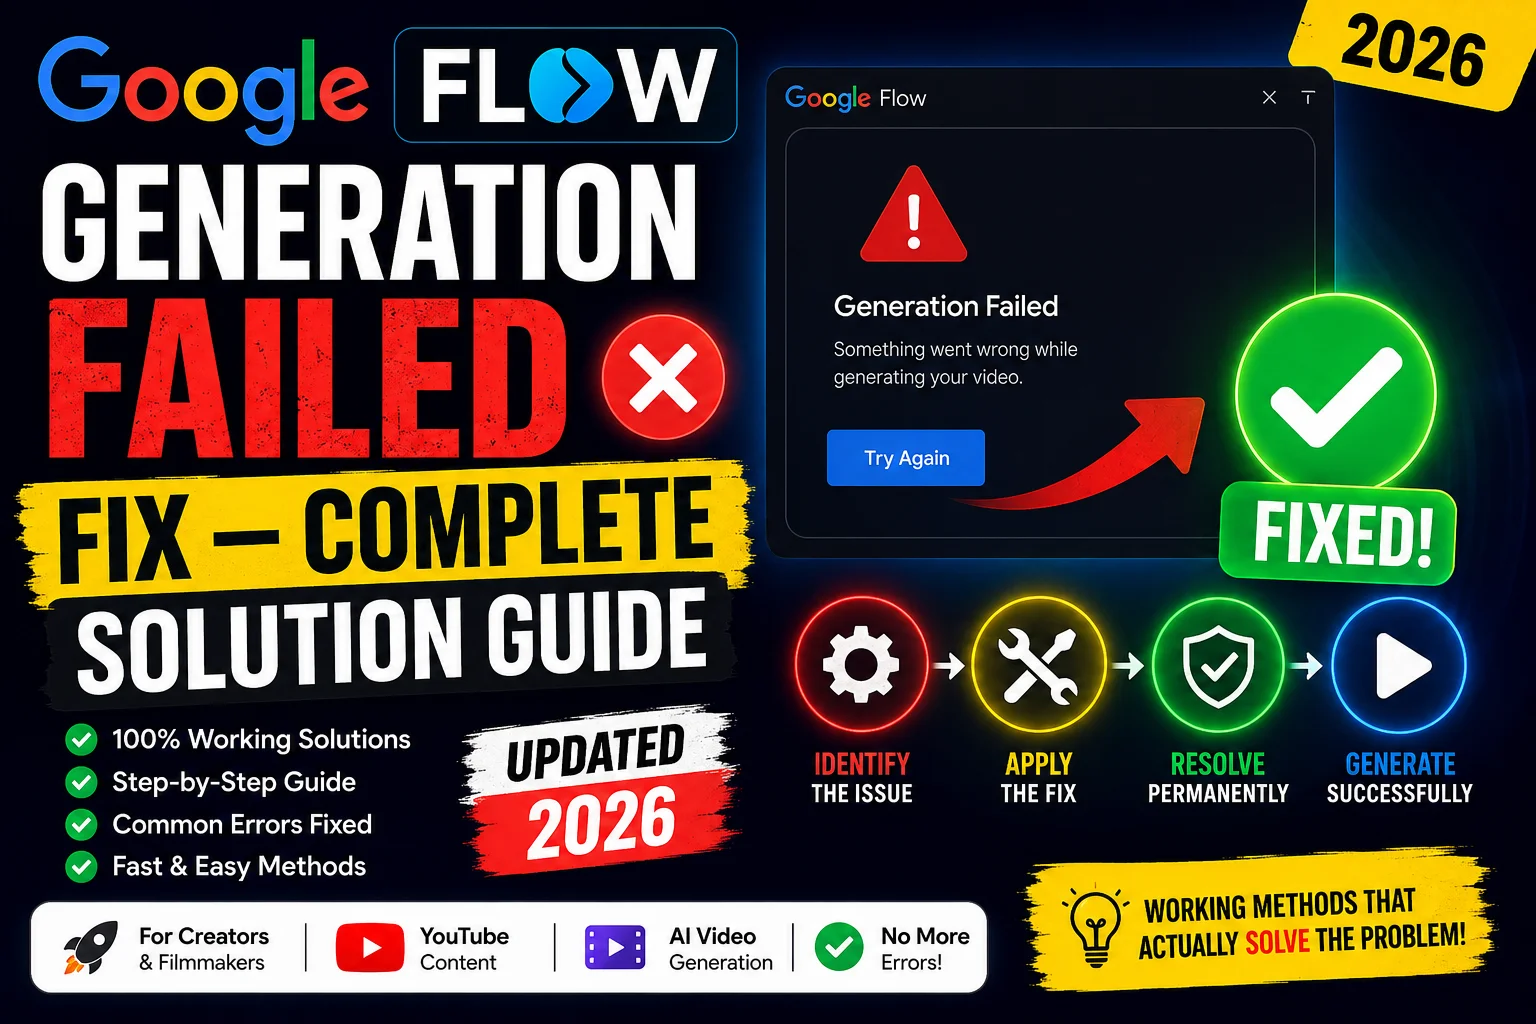
The video generation is taking very long Normal generation time is 45 seconds to 2 minutes. If it’s been significantly longer than that, there may be high server load. Try closing and reopening the tab, or wait and try again in a few minutes. This is not a reflection of your ingredients — it’s a platform load issue.
I’m not seeing the Ingredients option in Flow AI Make sure you’re on a personal Google account, not a Google Workspace account. Some Workspace configurations limit access to Flow AI features. Also confirm you’re at flow.google specifically — not Google Labs or any other URL.
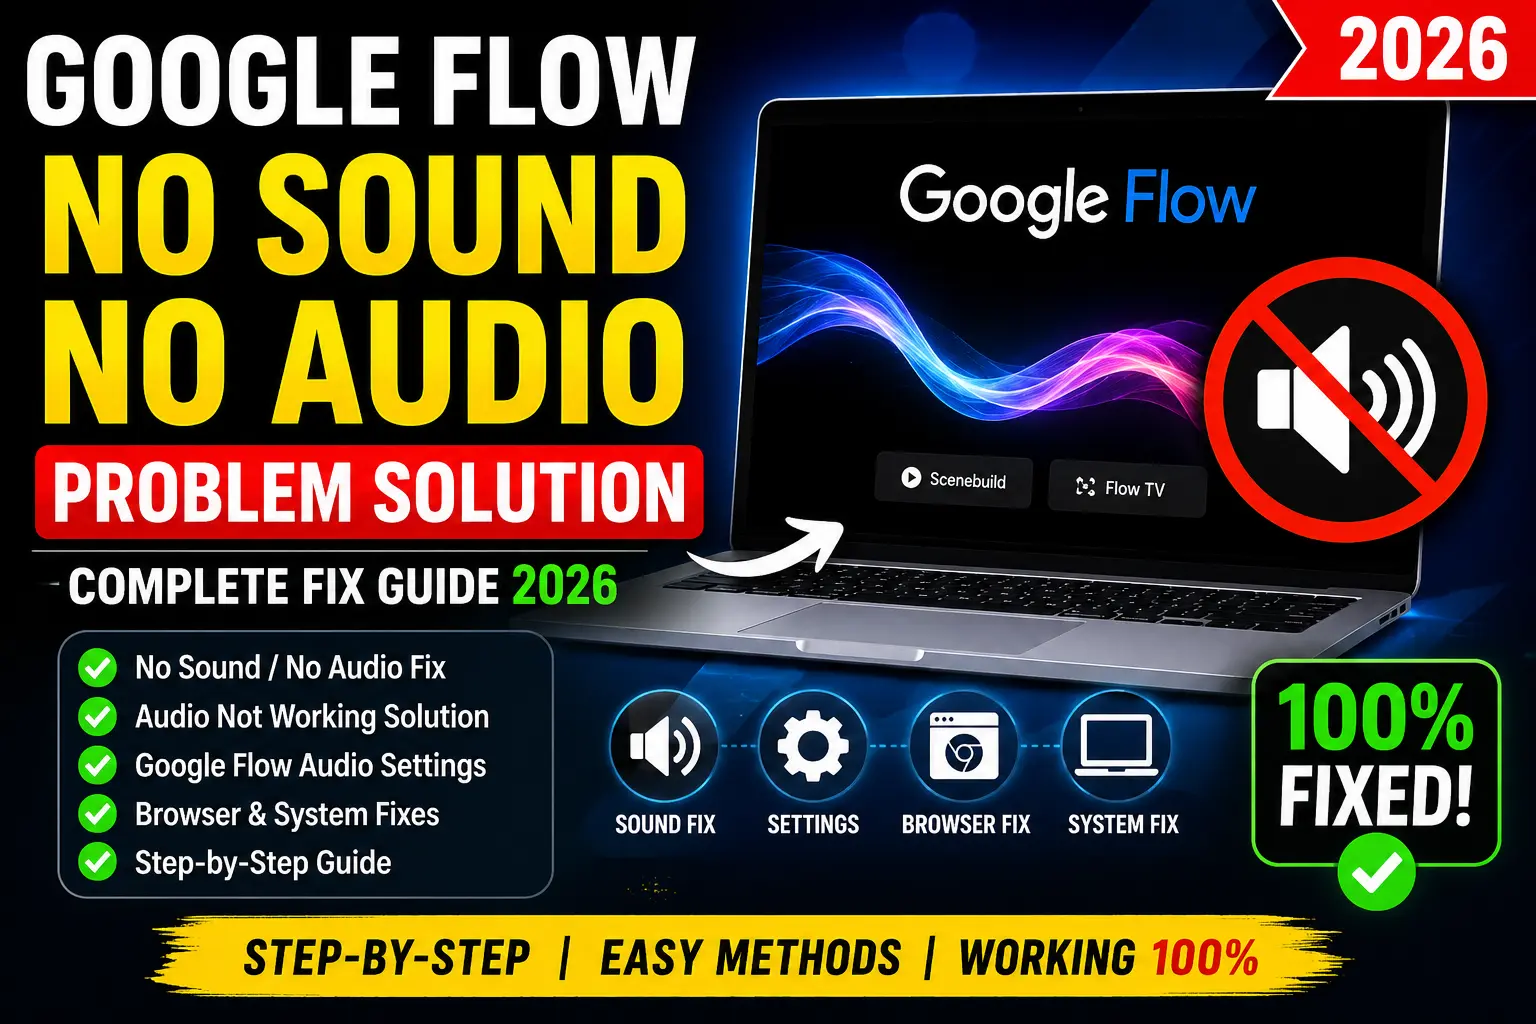
The video generates but there’s no audio Check that audio is enabled in your generation settings before clicking generate. Also confirm you’re in Video mode (not Image mode). If both are correct and audio is still missing, try generating again — occasionally a generation will produce a silent output due to a rendering issue, and regenerating typically resolves it.
For any issue not covered here, our Whisk AI not working fix guide covers the full range of Flow AI troubleshooting scenarios.
Frequently Asked Questions
Q: Is Ingredients to Video with Audio free? A: The Image generation version of the Ingredients workflow is free. Video generation — including Ingredients to Video with Audio — requires Google AI Plus ($19.99/month, approximately Rs. 1,400/month in Pakistan).
Q: Can I use my own photos as ingredients? A: Absolutely — that’s exactly what the feature is designed for. Photos from your camera roll, photos you’ve saved from the internet, screenshots, and any other images work as ingredient inputs.
Q: How many ingredients do I need? Can I use just one or two? A: You can generate with fewer than three ingredients — Flow AI will generate with whatever combination you provide. However, using all three (Subject, Scene, Style) gives the AI the most information to work with and typically produces the best results.
Q: Can I use AI-generated images as ingredients? A: Yes. Images you’ve previously generated in Flow AI (or any other AI image tool) work perfectly as ingredient inputs. Many creators generate a custom character image first, then use that as their Subject for video generation.
Q: How long is the video I get from Ingredients to Video? A: Individual clips are typically 5-10 seconds. You can extend clips using Flow AI’s Scene Extension feature, or chain multiple clips in the timeline to build longer sequences.
Q: Can I control what the character does in the video? A: The optional text prompt lets you guide the action. You can specify movement, camera direction, and scene events. The AI interprets these instructions alongside your ingredient images. The more specific your action prompt, the more control you have over what happens in the clip.
Q: Does this feature work in the mobile app? A: Yes. After the Google I/O 2026 launch, the Google Flow AI mobile app includes the full Ingredients workflow including video generation. Your credits work across both mobile and desktop.
Q: What happened to the original Whisk AI Ingredients feature? A: Whisk AI shut down on April 30, 2026. The Ingredients system — including Ingredients to Video — now lives inside Google Flow AI. Read our complete Whisk AI shutdown explanation for the full story.
Final Thoughts — Start With Three Photos
If there’s one thing to take away from this entire guide, it’s this: Ingredients to Video with Audio is the fastest path from “I have an idea” to “I have a video” that currently exists in AI creative tools.
You don’t need to write a long prompt. You don’t need to know anything about cinematography or video editing. You don’t need to find and license background music separately. You upload three photos, make sure audio is on, and click generate.
What comes back is genuinely remarkable — a video clip that reflects your character, your setting, and your aesthetic vision, with sound that actually matches what’s happening on screen.
That’s not a simple thing to build. Google DeepMind spent years developing the technology that makes Ingredients to Video with Audio feel effortless. Your job is just to find three good photos and give it a try.
Go to flow.google, open the Ingredients panel, and see what happens when you upload a Subject, a Scene, and a Style you care about. First-time results with Ingredients to Video with Audio are rarely perfect — but they’re almost always interesting. And interesting is where creativity starts.
When you’re ready to go further, our Google Flow AI Tutorial covers every other feature in detail. And the Veo 3.1 update guide explains everything that’s changed in the video generation model behind this feature.
Related Articles on WhiskAILabs:
- What Is Google Whisk AI? — Ingredients Explained
- Veo 3.1 Update 2026 — All New Audio Features
- Google Flow AI Tutorial — Complete Beginner’s Guide
- What Is Google Flow AI?
- Whisk AI Prompts — 100+ Best Prompts
- Advanced Prompt Engineering Guide
- Google Flow AI I/O 2026 Update
- Google Flow AI Mobile App 2026
- Whisk AI Shutdown — Full Story
- Whisk AI Not Working Fix Guide
- Pakistan Access Guide for Flow AI
- News & Updates — WhiskAILabs
- Veo 3.1 vs Sora 2 Comparison
Official External Sources:
- Google Flow AI — flow.google
- Google Blog: Veo 3.1 Audio Update
- Google Labs — labs.google
- Google DeepMind

AI tools researcher aur content creator hoon. Google Whisk AI, Google Flow AI aur image generation tools par actively kaam karta hoon. WhiskAILabs.net ka founder hoon jahan AI tools ko simple aur asaan andaaz mein explain kiya jata hai.